Sunday, January 31, 2010

Egg on my fingers (you thought I was going to say face, didn't ya?)

There must be some professional way to separate an egg. I am sure there are videos on youtube about it. However, I've never researched the topic. Instead, I gingerly crack the egg and break it apart while keeping the yolk on one half. Then I pray and cross my toes that while I transfer the yolk back and forth in the shell halves that it doesn't slip out with the egg white. Well, I am usually successful. I just end up with some egg on my fingers. So, here's a lovely recipe that requires the separating of an egg. Enjoy!

Double Chocolate Miniature Cakes (from my Mom’s Best Recipes Cookbook)
3-oz pkg of cream cheese, softened
1 egg, unbeaten
1 egg yolk, unbeaten (save white)
sugar
salt
1/2 C chocolate chips
3/4 C water
1/3 C salad oil (aka vegetable oil)
1 egg white
1 T vinegar
1 t vanilla
1 1/2 C flour
1/4 C cocoa
3/4 t baking soda
silvered almonds
(I used this for my cocoa. Silly Cow Farms. How could I resist?!)

In small bowl at medium speed, beat cheese, egg, egg yolk, 1/4 C sugar, and dash of salt until smooth; then stir in chocolate chips. Set aside. In large bowl bowl, combine egg white, water, salad oil, vinegar, and vanilla; beat well with fork. Sift into this flour, 1 C sugar, cocoa, baking soda, and 1/2 t salt. Stir with spoon until well combined. (See the two finished mixtures below.)
Fill each cupcake paper about half full with cocoa batter. Onto center of each, spoon 1 T cream cheese mixture. (Smaller if you are making minis)
(Isn't that picture beautiful? Doesn't it make you want to cry just thinking about all those mini cups of goodness?!)

Generously sprinkle tops with sugar and almonds. Bake 350 degrees for 25-30 minutes, until cupcakes are golden. Cool in pans 10 minutes; then remove to rack to finish cooling. Makes 15 large cupcakes, or ~30 minis.
Bake well and prosper!

Saturday, January 23, 2010

National Pie Day

I woke up today and read on some one's twitter post that it is national pie day today. No kidding. http://www.piecouncil.org/ So, I decided I would make a pie....my first one to make EVER. Well, I like chocolate, so I went from there and found this piece de resistance: Double-Chocolate Peanut Butter Pie. And from the first step I knew that it would be a great recipe. Why? Because I was already making a mess. In fact, I made a LOT of mess. Oh, and the second step? Yep. Mess.
I had to use my old dilapidated mixer for the heavy cream and the mixer only has one speed. SUPER FAST.
So, sometimes I have to put my hand over the bowl to make sure things don't spray everywhere. Well, it REALLY got me this time and I was NOT a happy camper. This is me being angry at my silly mixer. (Anyone care to donate a kitchen aid mixer to me?)
I even discovered I made a mess that I didn't see happen.
Chocolate on the floor?! That's not where that belongs. It belongs in my mouth!

Double-Chocolate Peanut Butter Pie (from http://www.foodandwine.com/recipes/double-chocolate-peanut-butter-pie)
Ingredients
CHOCOLATE CRUST INGREDIENTS
4 ounces semisweet chocolate, chopped (1/2 cup)
1/2 stick unsalted butter, cut into tablespoons
8 ounces chocolate wafer cookies (from a 9-ounce package), finely ground (2 cups)
PEANUT BUTTER FILLING INGREDIENTS
8 ounces cream cheese, softened (1 cup)
1 cup chunky peanut butter
1/2 cup sugar
2 teaspoons pure vanilla extract
1 cup well-chilled heavy cream
3/4 cup salted roasted peanuts, chopped
Kosher salt
CHOCOLATE TOPPING INGREDIENTS
4 ounces semisweet chocolate, chopped (1/2 cup)
1/2 cup heavy cream
Directions
MAKE THE CHOCOLATE CRUST: Preheat the oven to 375°. In a medium glass bowl, combine the chocolate and butter and microwave at high power in 20-second intervals until the chocolate is melted. Stir well, then stir in the cookie crumbs. Press the cookie crumbs over the bottom of a 9-inch springform pan and 1 1/2 inches up the side. Bake the crust for 10 minutes, or until set; the crust will continue to firm up as it cools.

MEANWHILE, MAKE THE PEANUT BUTTER FILLING: In a large bowl, using a handheld electric mixer, beat the cream cheese with the peanut butter, sugar and vanilla extract until blended. In another large bowl, using the same beaters, whip the chilled cream until firm. Fold one-third of the whipped cream into the peanut butter mixture to loosen it, then fold in the remaining whipped cream and 1/2 cup of the chopped peanuts. Spoon the filling into the crust, smoothing the surface. Sprinkle lightly with salt and refrigerate until set, about 3 hours.

MAKE THE CHOCOLATE TOPPING: In a medium glass bowl, combine the chocolate with the heavy cream and microwave at high power in 20-second intervals until the chocolate is melted and the cream is hot. Stir the chocolate topping until blended, then let cool to barely warm, stirring occasionally.

Spread the chocolate topping over the peanut butter filling and refrigerate until just firm, about 15 minutes. Sprinkle the remaining 1/4 cup of chopped peanuts around the edge of the pie. Carefully run a thin knife around the pie crust to loosen it, then remove the springform ring. Using a sharp knife, cut the pie into wedges. Run the knife under hot water and dry it between each cut.

Make Ahead
The pie can be covered and refrigerated overnight. Garnish with the chopped peanuts before serving. Serve the pie chilled or slightly cooler than room temperature.
(Erika's Extras: Warning: This pie is SUPER peanut-buttery the first day! Best to wait a day until serving. Also, I found that every step produced a little more crust/filling/topping than needed. Solution: take the extra chocolate wafers and dip in filling/topping and enjoy!!!!) :)


Bake well and prosper!

Tuesday, January 12, 2010

I'm the next Charlie Chaplin

I can't help it, but every time I eat peas, I make this little fella.
Yep, that's two green eyes and nostrils looking at ya.

When I was a kid, I saw the Charlie Chaplin Table Ballet where he puts two forks into bread rolls and does a dance with them. (Youtube it!)

Well, this is my alien. It stems from my loving what Charlie Chaplin did. My alien always demands that I take him to my leader and I show him the way.....into my mouth. (Yes....I'm looking into clinical help for this.)

Pea Alien
Take two cooked peas and insert the two prong ends of a fork into them. Voila! (LOL)

Bake well and prosper!

Saturday, January 9, 2010

A Nice Idea for a Saturday Morning

When I was a kid, I used to wake up every Saturday and watch the Saturday morning cartoons. I had it down to an art. Once Garfield and Friends was done and the credits were rolling on channel 42, I would switch to channel 24 for The Tick. Life was good. Life was simple. I had a schedule and I was happy.

My joyous days of watching cartoons are long gone, but my good, simple, happy times on Saturday mornings are not. Introducing a simple, good, and happy recipe:

Lemon Pancakes with Blueberry Compote
All you need to do is find a pancake mix or recipe you like and add some lemon juice.
I really like Highland Sugarworks buttermilk pancake mix. Unfortunately, pancake mix and flour are quite the same and I got the mix EVERYWHERE (please see the aqua blue arrows in the picture below.)
All over my clean dishes. :( Yes, I'm even messy on Saturday mornings. *sigh*

So, make the pancakes and then add some blueberry jam on top. (Compote...jam....whatever. I told you this recipe would be simple!)

Voila! Simple and lovely pancakes that will make you and your tummy happy. You can get all the above baking items at Whole Foods....except the mess. I personally own that item.

Bake well and prosper!

Tuesday, January 5, 2010

12 Days of Christmas - Day 12

Hallelujah! It's day 12. Yep, the big 1-2. And to celebrate the end of the celebration, I'm going to share with y'all one of my "invented" recipes.

I suppose it's not really invented.....more of improved.

Baileys Irish Cream Brownies

Yes. You read right. And yes, I will wait a second for you to find a napkin to wipe the drool from the corner of your mouth.

So, you can either make brownies from the Supernatural Brownie recipe (Ahhhh.....the Sweet Taste of Victory ) and add Bailey's to your liking (no more than 8 ounces) or make brownies from a box and substitute the oil with Baileys.
(I love how this picture came out all yellow and fuzzy as if the camera were getting tipsy off the smell of the Baileys. Oh, and yes, that is flour on my sleeve which I didn't realize was there until I took this picture. *sigh*)

Then, with about 5 minutes left to bake, take the brownies out of the oven and pour a little bit of Baileys on top to make a nice type of drizzled glaze. Most of the recipes I post make your kitchen smell wonderful. This one does too....if you count a saloon as a wonderful smell. :)
Bake well and prosper!

Monday, January 4, 2010

12 Days of Christmas - Day 11

UPDATED 11/18/10 with new picture:
It has been tremendously cold here in NYC. So, as I was flipping through my mom's best recipes cookbook, the McIntosh-Oatmeal Cookies popped out at me. It sounded like such a wonderful cookie to go along with my fire in my laptop fireplace. I could pretend I was sipping hot cider and munching on these cookies while sitting by a fire at a ski lodge. Funny thing is, I've never been to a ski lodge let alone skied. Ha!

As I was preparing these cookies I realized something.....I had never peeled an apple before. So, of course, I took a picture of my first apple peeling experience and yes, it was messy. So messy that I can tell you what it is like to have a slice of apple fall on your feet.
And yes, that orange thing in this next picture IS a bird shaped peeler.
McIntosh-Oatmeal Cookies (from my Mom's Best Recipes Cookbook)
1 C unsalted butter, softened
1 1/2 C sugar
1 1/2 C flour
1 t baking soda
1 t cinnamon
1/2 t salt
1 t vanilla
2 large eggs
2 medium McIntosh apples, peeled, cored, and diced (about 2 C)
3 C oatmeal
1 C raisins
3/4 C walnuts, chopped

In large bowl, with mixer at medium speed. beat butter and sugar until light and fluffy, about 5 minutes. Add flour, baking soda, cinnamon, salt, vanilla, and eggs; beat until just blended, occasionally scrapping bowl with spatula. Stir in apples, oats, raisins, and walnuts.

Drop dough by level 1/4 C, about 3 inches apart, onto ungreased cookie sheets. Bake 350 degrees until golden, 20 to 25 minutes, rotating cookie sheets between upper and lower oven racks halfway through. With wide spatula, transfer cookies to wire racks to cool completely.

Bake well and prosper!

Sunday, January 3, 2010

12 Days of Christmas - Day 10

Wow. This whole baking/putting together 12 recipes in a row is really hard and time consuming (when having other things to do....like having a full time job and hosting people for the holidays while being completely charming and cute etc etc.) Thank goodness for my guest bakers! And today, as a special treat, my guest baker is also taking over the rest of the blog entry and is becoming a guest blogger. Yay! Seeing that Jen made something this Christmas that I thought was just a silly made up thing in a Christmas carol and that not many of us have ever made or even seen in our lives, she deserves this special honor. (That, and she's one of my best friends.) Take it away, Jen.

Jen's Figgy Pudding:
So I found this recipe after much searching. It looked like the easiest to put together. What I found while grocery shopping and making the pudding was that the ingredients are a matter of taste and opinion. For example, I used pitted prunes instead of dates, I left out the almonds and cherries, and I used regular brandy. Also, being a vegetarian, I could not use beef suet. Instead I used shortening. (By the way, it's really hard to find suet in the US from what I gather. It is available from the United Kingdom in a box over the internet).

I bought my pudding mold from Sur la Table. The recipe here says it can make four puddings, but with the mold I bought, I made two large puddings.

It's easiest to steam it in a crock pot because you can leave it alone for the 12 hours it has to steam.

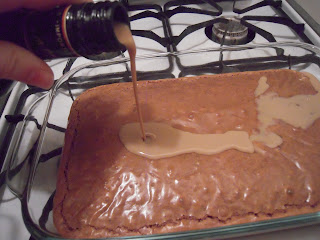
When the pudding is done and you're at the refrigeration/once a week pour brandy stage, I found it's good to soak the cheese cloth in the brandy and pour about a shot glass worth over the pudding.

English Plum Pudding/Christmas Pudding/Figgy Pudding (from
http://homepage.mac.com/balexic2/christmaspudding/Menu17.html)
Ingredients:
1/2 lb. (1-1/4 cups) chopped pitted dates
1/2 lb. (1-1/4 cups) candied lemon peel
1/2 lb. (1-1/4 cups) candied orange peel
1/2 lb. (1-1/4 cups) candied mixed peel
1/2 lb. (1-1/4 cups) candied red cherries
1/2 lb. (1-1/4 cups) candied green cherries
15 ounce package dried currants
15 ounce package seedless raisins
15 ounce package yellow raisins
1 cup of ground almonds
2 cups of apricot or peach brandy
••••••••••
2 cups sifted all-purpose flour
1/2 cup light brown sugar
1 teaspoon ground cinnamon
1 teaspoon ground ginger
1 teaspoon ground nutmeg
1/4 teaspoon of ground cloves
1 teaspoon salt
1 cup of dry bread crumbs
1 lb. of chopped beef suet
6 large eggs, well beaten
6 ounces of red currant jelly (not jam)
••••••••••
Butter (to grease the pudding molds)
A few drops of Cognac or Brandy (weekly) to keep the pudding moist while it ages

Day 1- Day4
During this time it’s necessary to soak the fruits and ground almonds in apricot brandy, so that the fruit absorbs the brandy.

Place the dates, lemon peel, orange peel, mixed peel, red cherries, green cherries, currants, seedless raisins, and ground almonds in a very large metal or ceramic mixing bowl.
Add the apricot or peach brandy.

Mix all these ingredients thoroughly (taking care not to crush the cherries). It’s recommended to use a metal spoon. I’ve broken a few wooden spoons on Plum Puddings in the past. The ingredients are heavy... and get heavier as they soak up the brandy as the days go on. I would not recommend mixing the ingredients in an electric mixer. The machine may crush the cherries, not to mention the fact that the ingredients are so heavy they might burn out the motor.

Once everything is mixed, cover the mixing bowl with clear plastic wrap, and let soak for 4 days. Every day or so during this time, take the plastic wrap off, and mix up the ingredients. If the mixture looks a little dry... sprinkle on more apricot or peach brandy.

Day 4
Place the flour, brown sugar, cinnamon, ginger, nutmeg, cloves, salt and bread crumbs into a large mixing bowl. Mix these dry ingredients well, before adding the next ingredient. Now add the beef suet into the dry ingredients. Mix well. When the pudding cooks, the suet melts, so it must be well distributed or else it will look clumpy.

Split the brandy soaked fruit between two large mixing bowls (one bowl won’t be able to hold all of the mixture). Add the dry ingredients evenly between both bowls of fruit. Next add the beaten eggs, and currant jelly evenly... again between both bowls. Mix all this thoroughly, taking care not to crush the cherries if you can. This recipe makes 2 large puddings and 2 small ones. I give away the extra puddings to family members, as gifts. By this point you should have two very heavy bowls of a very sticky pudding mixture.

Next I grease up my molds with butter, so that unmolding the puddings later on will be easier. Press the mixture into the bottom of the bowl/mold gently. The bottom of the bowl will be the top of the pudding once it is cooked and unmolded. Pressing the mixture in, ensures you have a solid pudding with no holes or gaps. Before filling up the bowls to the top, I stick to an old English/Irish tradition of my mothers (stretching back to the days of Charles Dickens). I put a very clean penny into the pudding. Tradition says that the person who finds the penny, will get one year of good luck... (be careful to tell your guests, to watch out for the penny). Don’t fill the pudding bowls up to the top. The pudding tends to expand when it cooks. Once you have all the pudding mixture in the bowls, press down with the back of a spoon to smooth out the pudding.

Cover each pudding mold with silver foil, and seal each covered bowl with a heavy duty elastic band. I use 3 elastic bands to be sure. It is important to do this, as you don’t want any water to get into the pudding when it’s cooking, in the water bath. Make sure you don’t get water in the pudding!

The puddings are now ready to be cooked, in a water bath or “bainmarie”. I place the puddings into a slow cooker (crock pot), and fill up the bowl with boiling water. I leave about 3 cm or 1 inch of space between the water level and the top of the pudding mold, so that water does not get into the pudding molds. I then cook the pudding (depending on it’s size) for 10-12 hours on medium or high heat. It’s virtually impossible to burn something in a water bath. So over cooking the pudding at low temperatures is hard to do. For the last 20 years I’ve used a “slow cooker” or crock pot to cook my puddings. A crock pot cooks at very low temperatures, and are meant to be left alone for hours on end. It’s perfect for those who have to work. You just set the cooker on medium or high, and come back a few hours later. I usually check the pot every 8 hours or so, to make sure there is still enough water in the pot, and that it has not evaporated too much.

If you don’t have a slow cooker you can always put the pudding bowls into a big pot of water and cook it on low for several hours. Make sure the water doesn’t boil, as boiling water can get into the pudding molds sometimes.

Note: Don’t put cold pudding molds into boiling water, unless the bowl is of a tempered material. The bowl may crack from the drastic temperature change.

Be careful handling the puddings once they come out of the slow cooker. They are hot, and they take a while to cool down. I usually let the pudding sit on the counter for a few hours, before I attempt to unmold it. When one pudding is taken out of the slow cooker, I place the next one in, and start the long cooking process all over again. For 4 puddings I will be cooking nonstop for 2 days. It is a labour of love... and it only comes once a year, so I don’t mind.

I usually start making my puddings in early or mid October. There is a reason for this. As the puddings age, they develop more flavor. Smell the pudding once it’s first cooked. Then smell the pudding on Christmas Day. You can smell and taste the difference in an aged Plum Pudding. I wouldn’t dream of making a pudding one month before Christmas. It’s not enough time to make one, in my opinion. I just remember every October to start making the pudding... it’s become a tradition for me. It’s also one less thing to worry about before Christmas.

After unmolding the puddings (once they are cool). I will cover each pudding in cheese cloth, and then cover them in foil or keep them in a metal tin. I don’t have a large tin anymore... so I use the foil method. Before I wrap the puddings, I will sprinkle brandy or cognac on the puddings. I then wrap the puddings in rinsed cheese cloth.
Note: New cheese cloth can smell medicinal... so rinse it in water, and wring out the water before using.

Once the pudding is wrapped in cheese cloth, I then wrap the entire pudding in silver foil, and store it in the refrigerator. A cool place can be used as well. Once a week I will take the foil off, and the cheese cloth, and sprinkle the pudding with brandy or cognac. Then I wrap it back up again (in the same cheese cloth and foil). Sometimes I have to replace the foil if it tears. At any rate I keep up the weekly maintenance on the puddings until Christmas.

On Christmas Day I will place the pudding back into it’s mold and cover it with foil, and sealed the mold with elastic bands, and re-cook it again on a low setting. I will leave the pudding to cook/warm until the evening meal. I unmold the warm pudding onto a plate, and place a cross mark into the top of the pudding with the handle of a wooden or plastic spoon. I do this to allow flaming brandy to run down the cross marks on all sides, when the pudding is presented at the table.

In order to flame brandy, the liquor must be warm or hot. Cold brandy is impossible to light. I usually place a shot glass full of brandy into the microwave and heat it until it starts to steam. I then place the heated brandy over the pudding, letting it run down the sides of the pudding, where I put the cross indentations on the top. I then quickly light the pudding with a lighter or match. Be careful not to burn yourself. A blue flame will cover the pudding where the brandy ran down. The flame will go out eventually after a few seconds. The brandy gives the pudding
more punch, plus it looks spectacular to flame something at the dinner table.

I usually serve the pudding with a hard sauce, and or fresh whipped cream. Children like whipped cream, whereas the hard sauce contains even more brandy... and grown-ups usually prefer it.

Way to go Jen for having the patience and time to make your own figgy pudding. Now I see why I thought this dessert didn't exist. It takes WEEKS to make it! Sheesh!

Bake well and prosper!

Saturday, January 2, 2010

12 Days of Christmas - Day 9

The last time I made this Chocolate Sheath Cake recipe, I made it without a sifter. The instruction say to sift the box of powdered sugar that is part of the icing. I figured it wouldn't be such a big deal. WELL, it turned out to make tiny little chunks of powdered sugar. It tasted fine, but was a little weird to chomp through.

My foodie friend Allen was aghast when he found out that I didn't own a sifter. Well, for my apartment warming party (my party was to help "warm" my new space, but also celebrate the first time in my life that I was living alone. That's right. No family and better yet, no room mates!!!!), Allen was so sweet as to give me a sifter. Unfortunately, it was one of those "new-fangled" kinds with two sifting layers and a squeeze handle. So, pretty much, it took FOREVER to sift something and then was impossible to clean.

Not to worry though. I changed it for a "traditional" one and made this dessert again for the 9th day of Christmas.
(BTW...that's not snow by the cake. That's powdered sugar. What can I say? I'm messy!)

Only thing is, I wish I had room mates around for just a couple of minutes. I'm stuck with a lot of leftovers from all this baking! :)
Chocolate Sheath Cake (from my Mom’s Best Recipes Cookbook)
Mix together in large bowl, then set aside:
2 C sugar
2 C flour

Bring to rapid boil in pan, then blend while hot with flour & sugar:
1 stick butter (or margarine)
1/2 C Crisco
5 T cocoa
1 C water
1/2 t salt

Add to above mixture:
1/2 C buttermilk
1 t soda (stirred into buttermilk)
2 eggs slightly beaten
1/2 t vanilla

Mix well and bake in a well-greased jelly roll pan (15 1/2 x 10) at 400 degrees for 20 minutes.

Frosting:
(Start 5 minutes before cake is done so it can be spread on cake as soon as it comes out of the oven.)
1 stick butter
4 t cocoa
1/3 C milk

Bring to a full boil. Remove from heat and add:
1# box of powdered sugar (SIFTED - trust me on this one)
1/8 t salt
1 t vanilla
1 C nuts (nuts optional)Bake well and prosper!

Friday, January 1, 2010

12 Days of Christmas - Day 8

So, for the eighth day of Christmas I decided to make TX millionaires. Which was sort of funny seeing I was sporting one of my most interesting necklaces which I like to call my Goldschlager "bling."

Check it out in baking action. These desserts are also known as turtles, however, TX Millionaires sound so distinguished and make this next picture make sense.

Texas Millionaires (from my Mom’s Best Recipes Cookbook)
1 14-oz caramels
2 T milk

Mix together in double boiler. Add 2 C chopped pecans. Drop by teaspoonful onto greased platter. Chill.

1 giant Hershey milk chocolate
1/8+ block paraffin
(This can be substituted with chocolate bark or chocolate candy coating.)

Melt in double boiler.

Dip candy in chocolate mixture and chill.

Bake well and prosper.