Thursday, December 26, 2013

Pistachio Snowball Cookies

Whew! I made it. I made it through Christmas. Within a span of 20 hours I sang 2 rehearsals, 1 concert, and 3 church services. My voice was pretty tired come Christmas day, but I made it through all the carols.
 
It helped to be singing in a "new to me", beautiful church. Check out this pretty church:
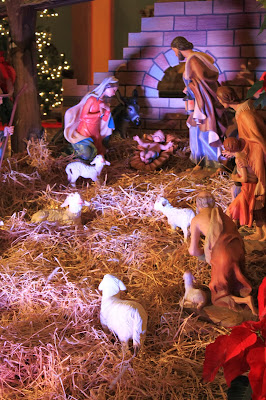
And the church's pretty crèche
 
After all the singing I did, I got to relax at my friends' place where they treated me to a scrumptious meal and I treated them to sangria and these pistachio snowball cookies.
I'm not a big fan of snowball cookies aka Swedish Cookies, Mexican Wedding Cookies, and Russian Tea Cookies. However, I did enjoy the pistachio twist with this recipe since I like pistachios. The pistachio flavor was nicely prevalent.
 
So, did you survive through Christmas? Did your survival involve cookies?
Pistachio Snowball Cookies (found on Completely Delicious <~Created the recipe)
 
1/4 cup (50 grams) granulated sugar
3/4 cup (170 grams) unsalted butter, at room temperature
1 teaspoon vanilla extract
1 1/2 cup (180 grams) all-purpose flour
1 1/2 cup (180 grams) pistachios, very finely chopped
Pinch of salt
Powdered sugar
 
Preheat oven to 325 degrees F. Beat the butter and sugar together in a big bowl on medium high speed until creamy and pale in color. Add the vanilla extract. Add the flour, pistachios and salt, and mix until just combined. Shape a tablespoon of dough into a round shape and place on a baking sheet, about 1 inch apart. (Feel free to use parchment paper on the cookie sheet.) Bake until cookies just begin to turn golden brown, about 15 minutes. Let cool on pan enough to touch but still warm, then roll in powdered sugar. Let cool completely and then roll in powdered sugar again.
 
Erika's Extras: I found the dough a little hard to mold. I had to constantly squish it to form the mounds, but it eventually did and didn't fall apart once baked.
Bake well and prosper!
 

Wednesday, December 18, 2013

Pineapple Coconut Bread Pudding with Buttered Rum Sauce

It's almost the start of the New Year so I've been thinking about what my 2014 New Year's resolutions will be. This got me to thinking about what they were for this year and then I remembered that my resolution involved baking. And I quote (from my blog entry on Jan 16, 2013), "I have decided that 2013 is the year I take on more challenging recipes. Recipes that push me out of my comfort zone and hopefully make me realize that yes, I CAN do it. It will also help me understand different techniques of baking that I haven't dabbled in yet. (Or I'll learn from my failure with the new techniques.)"
 
I've done pretty well this year with trying new recipes that weren't my usual go tos (cookies & brownies.) In fact, I've never made a bread pudding before and lookie here! While it's not complicated, I did get to try something new!
 
I brought this to a holiday party and people raved about it. I used a basic recipe and added a couple ingredients to the bread pudding and then added a buttered rum sauce. I think THAT'S what made people rave. :)
 
Have you thought about your 2014 resolutions? Do they involve baking?
Pineapple Coconut Bread Pudding with Buttered Rum Sauce (adapted from allrecipes.com)
Ingredients for Pudding:
3 eggs
 
4 tablespoons white sugar
4+ teaspoons of rum
Directions for pudding:Preheat oven to 350 degrees F (175 degrees C). Grease a 9x13 baking dish. (Or use ramekins.) Beat eggs and sugar in a large bowl until sugar is dissolved. Stir in pineapple, butter, coconut, and raisins. Stir in bread until well coated. Pour mixture into prepared baking dish and sprinkle with brown sugar. Bake in preheated oven until bread is fluffy, about 40 minutes.

Directions for sauce:
When pudding is ready to be served, melt butter in a pan on the stove and stir in the sugar and rum. Once completely melted, drizzle over the bread pudding while warm and enjoy. 
Bake well and prosper!

Monday, December 16, 2013

Pomegranate and Orange Sangria

"It's that time of year...when the world falls in love. Every sound you hear seems to say...Merry Christmas! May your New Year dreams come true!" 
 
There's something about this sangria that makes me think of happy Christmas songs. Maybe it's because this sangria is so pretty and festive. Maybe it's because I made it for a Christmas party. Maybe it's because it's tastes wonderful and has alcohol in it. So many possibilities as to why...

Well, I guess it IS that time of year, isn't it? I mean, I'm not falling in love with a person, but I am falling in love with the Christmas spirit!
 
I got my Christmas tree this past weekend.
Tada! I named it Treevor, the Christmas tree. (And no, it's not small. I happen to be very tall.)
 
I also made Christmas cards this past weekend. People liked my handmade Christmas cards from last year, so I made some more this year (with different designs, of course!)
 
I also sang a lot of Christmas music yesterday with orchestra. Oh, and it snowed all day on Saturday.
 
I guess all these things are contributing to my Chritmas-y feeling. It's beginning to look a lot like Christmas...at least in my neck of the woods it is!
 
Are you getting ready for the 25th? If you're looking for a festive cocktail, this sangria is one of the best sangrias I've had. The addition of orange juice and pomegranate juice creates a subtly sweeter drink but the brandy, wine, and cinnamon stick equalize the sweetness so one is left with a smooth, tasty drink with a kick of spice.
Pomegranate and Orange Sangria (found at Completely Delicious)
1 bottle (750 ml) of red wine, like a Cabernet Sauvignon
1 cup (237 ml) brandy
1 cup (237 ml) pomegranate juice
1 cup (237 ml) freshly squeezed orange juice
1 orange, thinly sliced
1 pomegranate, arils removed
1 cup fresh cranberries
1 cinnamon stick
 
In a large pitcher, stir together the wine, brandy, pomegranate juice, and orange juice. Add orange slices, pomegranate arils, cranberries and cinnamon stick. Chill in the fridge for 2 hours. Serve with ice cubes. (Erika's Extra: I didn't serve with ice cubes since it was still nice and cold from the fridge.)
Bake well and prosper!

Tuesday, December 10, 2013

Grasshopper Dessert

I'm not a picky eater, but there are some things I really can't stand. These foods go on my "will not eat" list.

Do you have a list like this? Foods that you refuse to eat because you find them disgusting?

Well, I already mentioned in this Beer and Pretzel Cookie post that I can't stand beer nor coffee. (Funny thing is that I worked at a coffee shop for 3 years in college and still can't stand the taste of coffee/espresso. Love the smell though!) One of the other two things I can't stand is J-E-L-L-O. Lastly, while I love chocolate and I love mint, I can't stand them together.
So obviously, this dessert is something I avoid like the plague. (Jello's involved as is mint and chocolate!)

However, the rest of my family loves this dessert. I've been meaning to make it for years just to post about it, but I just couldn't bring myself to deal with actually making it.

Thankfully, my mother made it during Thanksgiving week and I happily watched her in the kitchen and took photos.
I was amused and disgusted watching my mom cut the jello. It looks alive!
Transferring the jiggly jello requires a skillful hand.
If you aren't careful, you might end up with a mess. (Yay!)
All my family enjoyed this dessert and I enjoyed taking photos of it. Don't worry. I still got a dessert. My mom had homemade chocolate chip cookies on hand - my fave!

I must admit that when I was a kid I wish that I DID eat this dessert because I loved the glasses my mom served them in. I also loved how festive this dessert is. The green is perfect for Christmas. I'm sure this could be easily turned into red jello as well, but I am definitely not the one to experiment with jello and find out!
Grasshopper Dessert (adapted from my Mom's Best Recipes Cook Book)
Ingredients
1 6-oz lime jello
1/4 C sugar
2 C boiling water
1 1/2 C cold water
1/2 t peppermint extract
2 C Cool Whip

For Topping
chocolate shavings and extra cool whip

Dissolve jello and sugar in boiling water. Add cold water and peppermint extract. Take 1 cup of the jello mixture and chill until slightly thickened. Pour remaining jello mixture into 8-inch square pan and chill until firm. Blend Cool Whip into thickened gelatin mixture. Pour into 8 serving dishes. Chill until firm. Cut the jello in the pan into cubes and place the cubes onto the thickened gelatin. Garnish with Cool Whip and chocolate shavings.
Bake well and prosper!

Tuesday, December 3, 2013

Post Thanksgiving Pumpkin Donuts

Since I enjoyed this donut recipe so much in October, I decided to treat my family to fresh donuts the morning after Thanksgiving last week so they could enjoy it as well. I doubled the recipe but I should have only done one and a half of the recipe. SO MANY DONUTS! (I think the double recipe made around 80 donuts!)
Thankfully, my tall family of 15 did a good job of eating most of the donuts. My nephews kept asking for more throughout the day. :)
I enjoyed a lot of pretty sunsets in TX for Thanksgiving week but I am glad to be back in NYC, the city I love. I'm gearing up for my birthday, Christmas, and New Year's all within a month's time. Let the good times roll! And let the oven roar with holiday baking!
 
Find the pumpkin donut recipe here: Pumpkin Donuts
Bake well and prosper!