Wednesday, December 26, 2012

Buckwheat Crêpes

As promised, the buckwheat crepe recipe from the post yesterday.
These crepes are so easy and I found them to be very dreamy. (If one can call food dreamy.)

Buckwheat Crêpes (from David Lebovitz)
18-20 crêpes
It’s best to let the batter chill overnight, but let it come to room temperature prior to frying them up. And keep stirring the batter as you go while frying since the flour tends to sink to the bottom.
2 cups (500 ml) whole milk
1 tablespoon sugar
1/4 teaspoon sea salt
3 tablespoons (80 gr) butter, salted or unsalted, melted
1/2 cup (70 gr) buckwheat flour
3/4 cup (105 gr) all-purpose flour (In France, I use type 65)
3 large eggs

In a blender, or with a whisk, mix together all the ingredients until smooth. Cover and chill overnight.
To fry the crêpes, remove the batter from the refrigerator about an hour before frying. Stir it briskly; it should be the consistency of heavy cream. (If not, you can add a tablespoon of milk.)
Heat a 8- to 9-inch skillet on the stove top. You can use a real crêpe pan that’s been seasoned, but I use a Tefal non-stick skillet which works great.
Drop a tiny piece of butter or neutral oil in the hot pan and wipe it around with a paper towel. (Only needed for the first crêpe, but feel free to re-butter after a couple of crêpes.)
Lift the pan and pour 1/4 cup of the batter in the middle of the hot skillet, swirling the pan to distribute the batter quickly and evenly. The pan shouldn’t be too hot or too cold: the batter should start cooking within a few seconds, giving you just enough time to swirl it. It may take a couple of crêpes for you to get your rhythm.
After about a minute, run a non-stick spatula around the underside of the rim of the crêpe, then flip the crepe over. (You can use your fingers after a little has been lifted, but beware, it will be hot!) So use the spatula the whole time if you wish.
Let the crêpe cook on the flip side for about 30 seconds, then slide it out onto a dinner plate. Repeat, cooking the crepes with the remaining batter, stirring the batter every so often as you go.
Crêpes should be served warm. To rewarm the crêpes for serving, fold the crepes and put them in a baking dish covered with foil. Heat them in a moderate oven until warmed through.

Serving
Feel free to be creative and use any fruits or sauces you wish. A smear of Nutella, your favorite jam or simply a drizzle of honey and a tab of butter is terrific folded inside. For savory crêpes, fold some grated cheese and maybe a piece of ham in the crêpe and warm in a non-stick or lightly-buttered skillet for a minute or so, flipping the crêpe midway though, until the cheese is melted.

Storage
Since this recipes makes 18-20 crêpes, it may be more than you need all at once. But if you’re going to stand over a hot stove, you may as well make extra and freeze them. Once cool, wrap securely in plastic film, then foil. They’ll keep in the freezer for a couple of months. You can also store them in the refrigerator for up to three days, well-wrapped.

Erika's Extras: I made a third of this recipe and stuck the batter in the freezer for 15 minutes. They turned out fine. (Just in case you don't need so many crêpes and if you're rushed on time.)
Bake well and prosper!

Tuesday, December 25, 2012

Merry Christmas Crepes!

Merry Christmas everyone! I made crepes for the first time this morning. It was a nice little treat for my roomie and me.

I gave him home made crepes and he gave me an iPad. I think that's a fair gift exchange. ;)

Recipe will be posted later. Enjoy today!
Bake well and prosper!

Thursday, December 20, 2012

Salted Peanut and Chocolate Chip Cookies (with Buckwheat Flour)

'Tis the season to be jolly, fa la la la la la la la la. Wow. That's a lot of la-ing. How about some ooo-la-la-ing at Bergdorf Goodman's windows?
 Tons of sparkle from lady's Bergdorf.
 I feel like some one's getting ready for the Baz Luhrman Great Gatsby.
Such fantastic imagination must go into each window!
A little optical illusion for passer-bys. Which way is up?

And from the men's store? Monkeys!
 Playing violins (like basses)!
Jamming on the piano.
And soaring through Manhattan...I mean the air!

If those monkeys have elephant friends, they could share and enjoy these cookies made with peanuts. I think the elephant would REALLY like this one.
If anything, I hope my fellow runners like them. I'm bringing them to our Christmas Lights Run after party along with buttered rosemary and orange nuts.

'Tis the season for lots of parties, fa la la la la la la la la!
'Tis the season for lots of baking, fa la la la la la oo la la!
Salted Peanut and Chocolate Chip Cookies (with Buckwheat Flour) (adapted from Almond Corner)
makes about 30  
1 C buckwheat flour
1 C flour1 and a half sticks of butter
1/2 C sugar
2 teaspoons vanilla extract1 egg2/3 C salted peanuts
1 C dark or milk chocolate chip


Preheat the oven to 355°F. Cream soft butter with sugar until fluffy, add vanilla extract and finally beat in the egg. Coarsely chop peanuts. Sift flour on top of the butter mixture, add chocolate chip and peanuts and knead everything together. Take the dough and form an about 3-4 cm diameter roll. Cut roll in about 0.5 cm slices and put them onto the baking paper covered sheet. Flatten them with the help of your fingers and bake about 10 minutes. (Erika's Extras: Since I used chocolate chunks I found the dough log more difficult to cut.)
Bake well and prosper! 

Friday, December 14, 2012

Boston Brown Bread with Golden Raisins

Last post from all my baking last week! Woot! (Or maybe this is a sad thing?) Either way, this post is actually a repeat, sort of. I've made Boston Brown Bread before. But I've always wondered what it would taste like with golden raisins.
My friend was a huge fan of these the last time I made them and recently he begged me to make some more. So then I had a reason to try it with golden raisins.
 
It was good, but I think I like the normal raisin version better. However, my friend loved the golden raisins. To each their own.
 
(Wrap them up for a cute looking baked-goods gift.)
Boston Brown Bread (from My Mom's Best Recipes Cookbook)
1/2 C molasses
1/2 C sugar
2 1/2 t baking soda stirred into
2 C buttermilk
1 t salt
1 egg
2 1/2 C wheat flour
1/2 C all-purpose baking flour
1 t baking powder
1 C golden raisins plumped

Combine ingredients. Stir. Grease and flour 5 15 oz cans. Fill about half full with batter. Put cans on a baking sheet or a large pan and bake at 350 degrees for 50 minutes with a cookie sheet covering cans. Uncover. Bake for another 10 minutes. Once done baking, remove from oven and then remove bread from cans when still hot. Use a knife around the edges to gently pry out.

Erika's Extra: BBB is best served warm and with butter on top and makes an especially good treat for breakfast. Mmmm!
Bake well and prosper!

Thursday, December 13, 2012

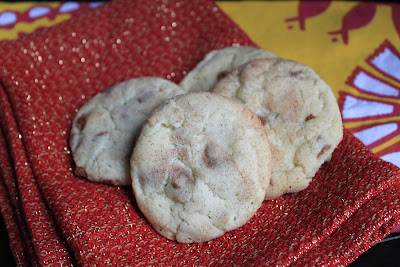
Cinnamon Chip Snickerdoodles

The last time I wanted to make a recipe with cinnamon chips I couldn't find any at the grocery store. This happened in the summer and I haven't thought about cinnamon chips since then.
 
Then came my birthday in December. I knew there was at least one guest who was attending my birthday party who didn't like chocolate. So I looked at my inventory of saved recipes and this one was the winner!
The cinnamon chips add such a flavor (and are quite nice to eat by themselves!) My only complaint is that the cookies looked deceptively soft and were not. But still tasted great! Next time I'll just pull them out of the oven earlier that it looks like I should.
 
I am glad my friend loved these cookies. She actually got to sample them the day before the party. She's pretty lucky like that. She's also going to be receiving one of my homemade Christmas cards which is EXTREMELY lucky since I'm only making a small batch. Check them out! 
I saw a post for these handmade cards on craftgawker. I'm really loving that site recently. (I guess this is what I do with my spare time since I'm done with opera gigs for the year...crafts!)
I got the Christmas tree idea from Aunt Peaches blog and added my own little pizazz to the top. The star design I made all by myself. *patting self on back*
 
Yes, these cards involved "killing" some books. But they were books that were falling apart or out of date information books. Technically, they are getting recycled. :) (Which is what will happen to the rest of the books.)
Cinnamon Chip Snickerdoodles (found at She Makes and Bakes)
1/2 cup butter
1 cup sugar
1 egg
1 teaspoon cream of tartar
1/4 teaspoon baking soda
1/2 teaspoon vanilla
1 1/2 cups all purpose flour
3/4 cup cinnamon chips

1 cup cinnamon sugar

Preheat your oven to 375 degrees.

In the bowl of a mixer, cream together the butter and sugar until light and fluffy. Add in the egg and beat on low until combined. Add in the cream of tartar, baking soda, and vanilla and mix until combined. Mix in the flour until incorporated. Fold in the cinnamon chips.

Form the dough into one-inch balls and roll in the cinnamon sugar. Cover a cookie sheet with parchment paper and place the balls about two inches apart from each other. Bake for 12 minutes until the edges are set and let cool on the sheet for one minute. Remove to a flat surface to cool. 
(Erika's Extras: Take out of the oven around 10 minutes for a softer cookie. Or, don't press slightly down on the dough balls when putting them on the cookie sheet.)
Bake well and prosper!
A card for my readers. Merry Christmas! I hope you're ready for the 25th! 

Wednesday, December 12, 2012

Cherry Hazelnut Nutella Fudge

Here's another recipe I made for my birthday party. I just had to have something chocolaty at my birthday!
 
This is the third time that I've made fudge. Each time keeps getting better. This is my favorite by far! And all my guests loved it.
My birthday guests also loved the "party favors" I made. Mustaches on the end of candy canes!
And I must admit that I had a lot of fun making them. I saw a post on craftgawker and then found out how to make them via Morena's Corner. Pretty simple. Get candy canes and brown pipe cleaner aka bump chenille sticks. Hold two together and cut in the middle. Take the halves that match each other in length and twist the ends together. Then twist the middle onto the end of a candy cane and use any type of glue to glue on. Style as you wish. (For best shape, curl the ends around a pencil.)
 
Back to the fudge: The combination of dried cherries, hazelnuts, and nutella with some sea salt on top was just perfect. If you want to impress guests, try this easy and yummy fudge recipe.
Cherry Hazelnut Nutella Fudge (found on Annie's Eats)
½ cup hazelnuts
1 (14 oz.) can sweetened condensed milk
1 tsp. vanilla extract (or 1 tablespoon coffee-flavored liqueur)
8 oz. bittersweet chocolate, finely chopped
1 cup chocolate-hazelnut spread, such as Nutella
3 tbsp. unsalted butter, at room temperature
½ tsp. coarse sea salt flakes, plus more for sprinkling
½ cup dried cherries, coarsely chopped
 
Preheat the oven to 250˚ F. Place the hazelnuts on a rimmed baking sheet. Bake for 20 minutes until lightly toasted and the skins have cracked. Transfer the hazelnuts to a clean kitchen towel. Fold half of the towel over the top of the hazelnuts and roll them around gently to help remove the loosened skins. Transfer the skinned hazelnuts to a cutting board and chop coarsely. (Erika's Extra: I used a paper towel and had a hard time getting the skins off. Keep with it though. They will come off!)
 
Line an 8 x 8-inch baking pan with foil and grease lightly with butter. Set a heatproof bowl over a pot with a few inches of simmering water (do not boil). In the bowl, combine the sweetened condensed milk, vanilla, chocolate, Nutella, butter, and salt. Heat, stirring occasionally, until the mixture is fully melted and smooth.
 
Remove the bowl from the heat. Add the toasted hazelnuts and dried cherries to the bowl and fold in until evenly combined. Pour the mixture into the prepared baking pan and spread into an even layer. After it has cooled for a few minutes, sprinkle lightly with additional sea salt. Cover and refrigerate until firm, about 3-4 hours.
 
Use the foil to lift the fudge from the pan. Remove and discard the foil. Use a large chef’s knife to slice the fudge into 1-inch squares. Store in an airtight container.
Bake well and prosper! 

Tuesday, December 11, 2012

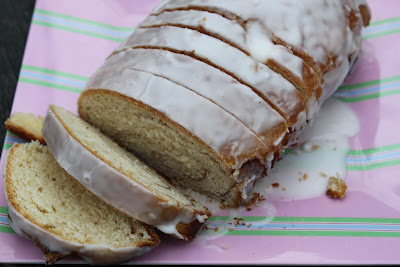
Overnight Coffee Loaves

So, last week I had a pretty important birthday.
Watch out New York City! You just gained another 30 year old female! I was very excited to leave my 20s behind. Not that they were bad. But I think there's something great about being in your 30s in NYC. I guess I just feel that this city caters to a slightly older crowd.
 
Speaking of catering to crowds, I baked up a storm to feed my friends for my birthday party! (I'll be posting all my baked goods this week, so keep your eyes out for everything.)
 
To usher in my 30s I decided to give back to my favorite city. I held a two part party. First part was picking up trash in Astoria Park. Second part was meeting at a bar. Those friends who volunteered were treated to a free happy hour on me. Those who decided to not volunteer and just meet at the bar paid for their own drinks. People really enjoyed this concept and everyone understood the rules.
 
Well, I couldn't have people picking up trash on an empty stomach now could I?
 
Since I had taken some days off of work to celebrate my birthday, I decided that I finally had enough time and I was finally mature enough to make Overnight Coffee Loaf.
 
You see, this is from my Mom's Favorite Recipes Cook Book. And all of my siblings and I LOVE this bread. So, I had some trepidations about making it. This bread had a lot of history behind it and I didn't want to mess it up.
 
Guess what. Within the first steps of the recipe I was a mess.
Thus, the bread turned out FANTASTIC.
I was fortunate enough to have a friend over who got to taste test it with me right when it came out of the oven. It was to die for. We ate a whole mini loaf. (I couldn't find my other loaf pan so I improvised. See below.)
I was very excited to share it with my volunteers before picking up trash. Too bad it was a gloomy and somewhat cold day. This bread is just so much better warm than cold. Nobody had a problem eating it though. :) And tons of trash was picked up! (Must have been the boost of sugar that helped. Here's a little bit of the trash that was found.)
Yes, that's a prescription bottle on the bench filled with lithium. Found. In. A. PARK! Eek!

So, as you can see, the first part of my birthday party was a success. Many of my friends told me that they didn't expect to have so much fun picking up trash. Ha!

Second part of party and more recipes from my birthday week to come. For now, here's the recipe for this delicious bread.
Overnight Coffee Loaf (from my Mom's Best Recipes Cook Book)
Makes 2 loaves of bread

1 pkg dry active yeast (or scant 1 T)
1/4 C warm water
4 C flour
1/4 C sugar
1 t salt
1 C butter or margarine (softened)
3 egg yolks
1 C lukewarm milk, scalded and cooled
2 T melted butter or margarine
1/2 C sugar
1 1/2 t cinnamon
powdered sugar glaze (powdered sugar and milk)

Soften butter. Cut in flour, 1/4 C sugar, and salt until mixture looks like a pie crust mixture. Dissolve yeast in warm water and stir with a fork so no big lumps form. Once stirred, mix in yeast, egg yolks, and milk. Cover; refrigerate at least 8 hours or overnight. Grease 2 loaf pans. Divide dough in half; roll out each half into an oblong shape that will fit into your loaf pan length wise when rolled up. Does not need to be super thin. Brush one side of each flattened dough with 1 T melted butter. Mix sugar and cinnamon. Sprinkle half on each half. Roll up dough, placing seam side down in pan. Cover and let rise 2 hours; dough will not double in size. Bake 350 for 1 hour. Remove from pan and let cool for a couple of minutes. Frost with powdered sugar glaze (mix 1 C powdered sugar and a tiny bit of milk.)
Erika's Extras: Add more cinnamon and sugar for a bolder cinnamon flavor in the bread.
 
Bake well and prosper!

Monday, December 10, 2012

Salty & Sweet Chocolate Chip Oatmeal Cookies

This post is long overdue. I promised the costumer from my last opera gig that I would post these last week. Whoops. The costumer loved the salt on these mixed with the sweetness of the sugar. I really should have posted it sooner. She did such a lovely job on my costume! (In the beginning it was awful and needed much TLC and that's what she gave it!)
That was my last opera gig of the year. Now I'm much less busy and just singing Christmas music (which is always fun). Oh, and I baked up a storm this past weekend. More on that later this week. I promise!
Salty Sweet Chocolate Chip Oatmeal Cookies (found on My Kitchen Addiction)
(Adapted from King Arthur Flour Cookie Companion, makes about 4 dozen)

1 cup unsalted butter (2 sticks), softened
1/2 cup granulated sugar
1/2 cup dark brown sugar, lightly packed
1 egg
1/4 cup light corn syrup
1 teaspoon vanilla extract
3 cups old fashioned rolled oats
1 1/2 cups all purpose flour
1 teaspoon baking soda
1/2 teaspoon salt
1 package (about 12 ounces) milk chocolate chips
1/2 cup raw sugar (Erika's Extras: I used organic sugar which was nice, but I think sugar in the raw is a much better choice)
1 1/2 tablespoons Kosher salt

Cream together the butter, granulated sugar, and brown sugar in a large mixing bowl. Add in the egg and beat until the batter is smooth. Add the corn syrup and vanilla extract and beat until incorporated.
In a separate bowl, whisk together the oats, flour, baking soda, and salt. Gradually add the dry ingredients to the creamed mixture, mixing on low until the batter comes together. Stir in the chocolate chips. Refrigerate the dough for at least 30 minutes.
Meanwhile, preheat the oven to 375°F and lightly grease your cookie sheets (or use a silicon liner or parchment, if you must). In a small dish, combine the raw sugar and Kosher salt.
Roll the cookie dough into 1-inch balls and then roll each ball in the sugar and salt mixture. Place each cookie on the baking sheet, and then press down with the palm of your hand to slightly flatten the cookie.
Bake for 8-10 minutes, until the edges of the cookies are just golden and puffed up (don’t overbake or the cookies will not be as soft and chewy). Cool on the baking sheet for about 5 minutes and then transfer to a wire rack to cool completely.
Bake well and prosper!

Monday, December 3, 2012

Potpourri: Baked Cinnamon Christmas Ornaments

I haven't done a potpourri (a non dessert post) in awhile! But this art project was just begging to be shared. And it DID involve baking.
 
My room mate and I decided that this past weekend was the weekend to get our Christmas tree. We had decided to get a bigger tree than last year which meant we needed more ornaments. I saw a post on these cinnamon and applesauce ornaments and knew where we would be getting those ornaments from!
My room mate was in charge of rolling out the dough and cutting the shapes. He did a very good job.
He even made a mess! Such a good start to the ornaments! (Remember: If it's a mess, it's a success!)
 
Annalise from and now for something completely delicious (I just love blogs with long names!) didn't decorate her ornaments, but I saw an opportunity to use my glue gun, ribbons, and gems! (And the opportunity for wine.)
I mean, it WAS a tree decorating party. Wine was a no brainer. ;)
How cute is this snowman with his scarf?!
The Christmas lights nicely reflect off these decorative gems on the candy cane.
 
There are two special ornaments that we made because I had cookie cutters in their shapes.
Yes. I own a PacMan cookie cutter set. Not the usual suspects, eh?
Our Christmas tree looked so lovely once we were done decorating it. The red ribbon that we used for some of the cinnamon ornaments really turned out pretty and ended up looking like bows on the tree from far away.

This was such an easy and fun craft project that I plan on making it a yearly tradition. You should try it too!

Baked Cinnamon Christmas Ornaments (from and now for...delicious)
Ingredients
1 cup applesauce
1-1 1/4 cup (130 grams) ground cinnamon
1 tablespoon ground cloves (optional)
 
Instructions
Preheat oven to 200 degrees F. Line a sheet pan with parchment paper.
1. In the bowl of a stand mixer fitted with a paddle attachment, combine the applesauce, cinnamon, and cloves (if using). It may take a few minutes for the mixture to come together. You want the dough to be able to form a ball without being too sticky. Add additional applesauce or cinnamon if needed.  (Erika's Extras: I found that the extra 1/4 cup of cinnamon was much needed.) You can mix the dough by hand, it may just take longer.
2. Sprinkle a clean surface with cinnamon (like you would with flour while rolling out pie dough). Place the dough on the surface and sprinkle with more cinnamon. Use a rolling pin to roll the dough to 1/4 inch thick, sprinkling with more cinnamon to keep from sticking.
3. Cut out into desired shapes and place on the prepared sheet pan so that they aren't touching. Use a skewer to poke a hole into each ornament (to attach string). (Erika's Extras: I used the small end of a chopstick to make the holes.) Bake in the preheated oven for 1 1/2 - 2 hours or until rock hard. (Erika's Extras: I found that the thin ones needed at least 1.5 hours and the rest were over 2 hours.)
4. Loop a decorative string through the ornament and hang on your tree. (Erika's Extras: This is the time to decorate the ornaments if you want to.)
Notes: Ornaments may also be dried at room temperature over several days.
Ornaments are not extremely fragile, but they can break. Handle with care.
Do not eat.
Bake well and prosper!