Showing posts with label new years resolution. Show all posts

Tuesday, July 30, 2013

King Arthur Blueberry Sour Cream Scones

If you read my blog, you know that I do a lot of baking for my coworkers.
 
Well, one of my coworkers visited the King Arthur Flour Factory and was nice to think of me and bring me a couple of boxes of mixes.
I usually bake most goodies from scratch, but I love the King Arthur brand and my curiosity was piqued. (I just realized that this recipe then can be included in my New Year's resolution: baking things out of my baking comfort zone. Woot!)

The batter was very easy to assemble and the scones were easy to construct. I should have used parchment paper on the cookie trays since the bottoms were burnt. Or maybe I need new cookie trays...

Either way, you would find these scones very, well, sconey! (Not too moist, not too dry, and somewhat crumbly.) The lemon glaze that I made for them was the perfect match with the blueberries.

PS Aren't my new dishes cute? A fellow runner got rid of items due to moving and I was the lucky gal who got these gems!
If you don't have access to the mix, here's a recipe to make from scratch from King Arthur's Website:
http://www.kingarthurflour.com/recipes/blueberry-scones-recipe
Bake well and prosper!
 

Thursday, July 18, 2013

Gluten-free Spicy Chickpea Brownies

Oh yes...you read correctly. Chickpeas. Brownies. Spice!
My friend sent me this recipe and I recently had a chance to make it for her. They were met with rave reviews.
 
I enjoyed this gluten free alternative brownie. The texture was very fudgy, which makes sense since they are made with liquidy/mushy chickpeas!
I had one friend say that he could tell that the brownies weren't made from normal ingredients but he would never have guessed chickpeas.
 
That surprise combined with the hint of cayenne pepper make these brownies a keeper for flavor filled gluten-free dessert recipes.
Gluten-free Spicy Chickpea Brownies (adapted from The Hairpin)
Ingredients
2 cups chickpeas
12 ounces of dark/semi sweet organic/fair trade chocolate
3 tablespoons olive oil
4 eggs
½ tablespoon vanilla extract
¾ cup sugar
2 tablespoons cocoa powder (dark/semi-sweet)
1 teaspoon baking powder
¼ teaspoon salt
½ teaspoon cayenne
½ teaspoon ginger (ground)
½+ teaspoon cinnamon

Directions
1. Preheat the oven to 350°. Line a 9x9 brownie pan with parchment paper and lightly spray the paper with  olive oil.
2. Dry chickpeas on a couple of layers of paper towels.
3. Once excess liquid is gone, puree the chickpeas in a food processor fitted with a steel blade. Scrape down the edges and puree until all of it is completely smooth. (Erika's Extras: My puree was still a little chunky and it turned out fine.)
4. In a double boiler, melt chocolate with the olive oil. Add it to the chickpeas and blend until it’s well mixed.
5. Add eggs, vanilla, and sugar and blend. Add the cocoa and spices and blend some more.
6. Pour batter into prepared pan.
8. Bake for about 25 minutes. (Erika's Extras: I baked mine for ~40 minutes. These are hard to overcook.)
Bake well and prosper!

Friday, May 24, 2013

Monkey Bread from SCRATCH!

It's a Friday before a long weekend which means I make monkey bread for my coworkers. Yes. It's tradition. (See here and here and here.)
 
I've wanted to make monkey bread from scratch using the Overnight Coffee Loaf recipe for the dough. So last night I did just that. Except...gulp...I had put in complete eggs. I didn't realize it only called for the yolks until after I stirred it together. I was sort of upset at myself but only for one minute. As my room mate can tell you, I said, "Oh well. It'll be a learning experience for me. I'll see how it turns out with egg yolks and egg whites!"
It turned out incredibly yummy. I was so happy with the results. It was so worth the waking up at 5am to pull the dough out of the fridge, sleeping, and then waking up again to put it together and in the oven. My coworkers agree.
Monkey Bread from Scratch (adapted from Mom's Best Recipes Cook Book)
1 pkg dry active yeast (or scant 1 T)
1/4 C warm water
4 C flour
1/4 C sugar
1 t salt
1 C butter or margarine (softened)
3 egg (or try just using the yolks of 3 eggs)
1 C lukewarm milk, scalded and cooled
1 C sugar
2 t+ cinnamon
 
Topping:
1 1/2 sticks butter
1 C brown sugar
1 t cinnamon

Soften butter. Cut in flour, 1/4 C sugar, and salt until mixture looks like a pie crust mixture. Dissolve yeast in warm water and stir with a fork so no big lumps form. Once stirred, mix in yeast, egg yolks, and milk. Cover; refrigerate at least 8 hours or overnight. Take dough out and punch it and then knead it briefly. Leave dough in bowl and cover. Let rise for 2 hours. (Dough will not double in size.) After 2 hours, grease a bundt pan. Make cinnamon and sugar and place in a small bowl. Take small chunks of dough and roll around in cinnamon and sugar and then place in bundt pan. Boil together butter, brown sugar, and 1 t cinnamon. Pour mixture over top of dough. Bake 350 for 1 hour or until the top of the dough is very hard. Remove from pan and let cool 10 minutes before inverting.
 
Erikas Extras: Frost with powdered sugar glaze (mix 1 C powdered sugar and a tiny bit of milk.)

Bake well and prosper!

Tuesday, March 19, 2013

Beer and Pretzel Cookies

To keep adhering to my New Year's resolution of baking outside of my comfort zone, I made these beer pretzel cookies.

I know what you're thinking: "But Erika, you bake cookies all the time." This is true. But I hate beer. Seriously. I hate the taste and smell of it with a passion.
Therefore, I introduced beer into my kitchen. I've never bought a bottle of beer from a bodega before. Mike's Hard Lemonade, sure. Beer? Ew, no!
This stout even had hints of organic Mexican coffee in it. And guess what. I also despise coffee.

So there I was in my kitchen having to boil this stout down to a syrup. The smell made me gag a couple of times. I've never gagged before from smells emanating from my kitchen. What a weird experience!
I actually didn't mind eating the cookie dough. However, I didn't like these cookies right out of the oven because the beer flavor was stronger. Once they had cooled off I had no problem eating them. (I made special non beer frosting for my own private stash.)
 
These were a hit for St. Paddy's Day. If you're a big beer and pretzel fan, I highly recommend this recipe.
Beer and Pretzel Cookies (found at Cookies & Cups)
Ingredients
1 (12 oz) bottle stout, minus 2 Tablespoons reserved for frosting
1 cup butter
1 1/4 cup light brown sugar
1/2 tsp espresso powder or 1 tsp ground espresso (Erika's Extras: I didn't use this ingredient)
2 eggs
1 tsp baking soda
1 tsp kosher salt
2 cups flour
2 cups quick oats
1 cup coarsely crushed pretzels
1 cup chocolate chips
 
Directions
Reduce beer (minus 2 Tablespoons) in saucepan over medium heat until there is only 1/8 cup left. This will take 25-30 minutes. Watch the beer on the stove, as it will foam up easily at the beginning. Remove from heat and allow to cool. (Erika's Extras: Feel free to stir occasionally, but not too often.)
Cream butter, brown sugar and espresso powder together until light and fluffy.
Add in eggs and reduced stout and mix until combined.
Turn mixer to low and add in baking soda, salt, flour, and oats. Stir together until just combined.
Finally add in pretzels and chocolate chips, stirring until evenly incorporated.
Let dough chill for at least 2 hours, or overnight. (Erika's Extras: I chilled my dough for around 6 hours and found the dough to be very tough to deal with until it was a little warmer. I would chill for only 2 hours.)
 
Frosting
In small saucepan heat butter and heavy cream over medium heat until just boiling.
Remove from heat and whisk in chocolate chips until smooth.
Add 2 Tablespoons reserved stout, stir to combine.
Chill frosting for an hour or two, until spreadable consistency.
 
Cookies
Preheat oven to 350°
Drop by heaping tablespoon size onto a parchment lined baking sheet, pressing dough slightly, so cookies aren't so rounded. (Erika's Extras: I rolled my dough into a ball and then pressed it down onto the parchment paper.)
Bake 9-10 minutes until golden around edges.
Transfer to a wire rack to cool.
When cookies are cooled and frosting is ready, spread on a teaspoon sized amount onto each cookie and top with a pretzel twist
Bake well and prosper!

Monday, February 11, 2013

Heart Shaped Italian Macarons

Ever since making my first batch of macarons last month I wanted to try a different macaron recipe/technique AND attempt to make them heart shaped. Well, I did and they were a success! How cute are these heart shaped treats? Is there any way to make them cuter?
Yep! Add some pink poodles into the shot.  My room mate figured that would be cute/funny and he was right!

Then I wondered if there was any way to make these even more adorable.
Yep! Drawing Valentine's messages on them with edible marker fit the bill nicely. How cute are they? My room mate exclaimed that they looked like Sweethearts and I had to agree. 
Not into the normal Valentine's Day messages? Don't worry. I have that covered too. Here's some updated messages that I felt were very "of the times" for today's society...and also made me giggle.
Still not into Valentine's Day/love? Been burnt too many times in the past? Don't worry. I have you covered as well.
There was one broken heart out of the 80+ I made.

I am glad to say that the folks eating these enjoyed the messages AND the yummy tastes of these macarons. I used an Italian technique (which incorporates hot sugar water which helps to make the tops shiny.) I really enjoyed this recipe and plan to keep it as my go to macaron recipe.

Happy Valentine's Day!
Love,
Available and Slightly Low Maintenance.
Italian Macarons (from Good Food)
Ingredients
200g almond meal, laid out on tray to dry for 2 days (Erika's Extras: I laid the almond meal out for only overnight and it worked fine)
200g pure icing sugar, sieved
150g egg whites (from 3 to 4 large eggs), sieved and allowed to stand at room temperature overnight
1/4 tsp cream of tartar
1g dry egg-white powder (optional)
200g white sugar
50g water
Few drops food colouring (Erika's Extras: I put in extra food coloring since the color of my last macarons faded while baking.)


Method
Preheat oven to 150C (around 300F). Place almond meal and icing sugar in a food processor and pulse to get a finer consistency. Sieve through a drum sieve into a large mixing bowl. Divide egg whites in two batches, each 75 grams. Place one batch of egg whites in an electric mixer fitted with a whisk attachment, add cream of tartar and egg white powder and set aside.
Mix the remaining egg whites into almond mix to make a thick paste, then set aside. Put sugar and water in a saucepan on medium heat, stir to make sugar syrup. Insert thermometer. When thermometer reaches 110C, start whisking egg whites on low speed. Gradually increase the speed until the egg whites are thick. If the sugar syrup gets too hot before the egg whites are ready, add three teaspoons of cold water to syrup to reduce the temperature. When sugar syrup reaches 118C and the egg whites are ready, slowly pour syrup down the side of the mixer while whisking the egg whites on medium speed. Continue to mix for about 10 minutes until the meringue cools (the bowl should still feel slightly warm).
Add food colouring. Using a pastry scraper, mix the meringue into the almond meal paste — no need to be gentle. Keep mixing until the paste is supple and shiny.
Shiny!
It is important to have the correct consistency. The mixture should be oozy and lava-like. When you fold the mixture over itself, it will spread slowly. Using a pastry bag fitted with a one-centimetre plain nozzle, pipe mixture on to a lined double baking tray. Using two trays ensures even heat distribution. You can use baking paper to line the trays but I have found a silicone baking mat gives the best result. (Erika's Extras: I used parchment paper and it worked fine. I also only had one tray in the oven at a time which was fine as well.)
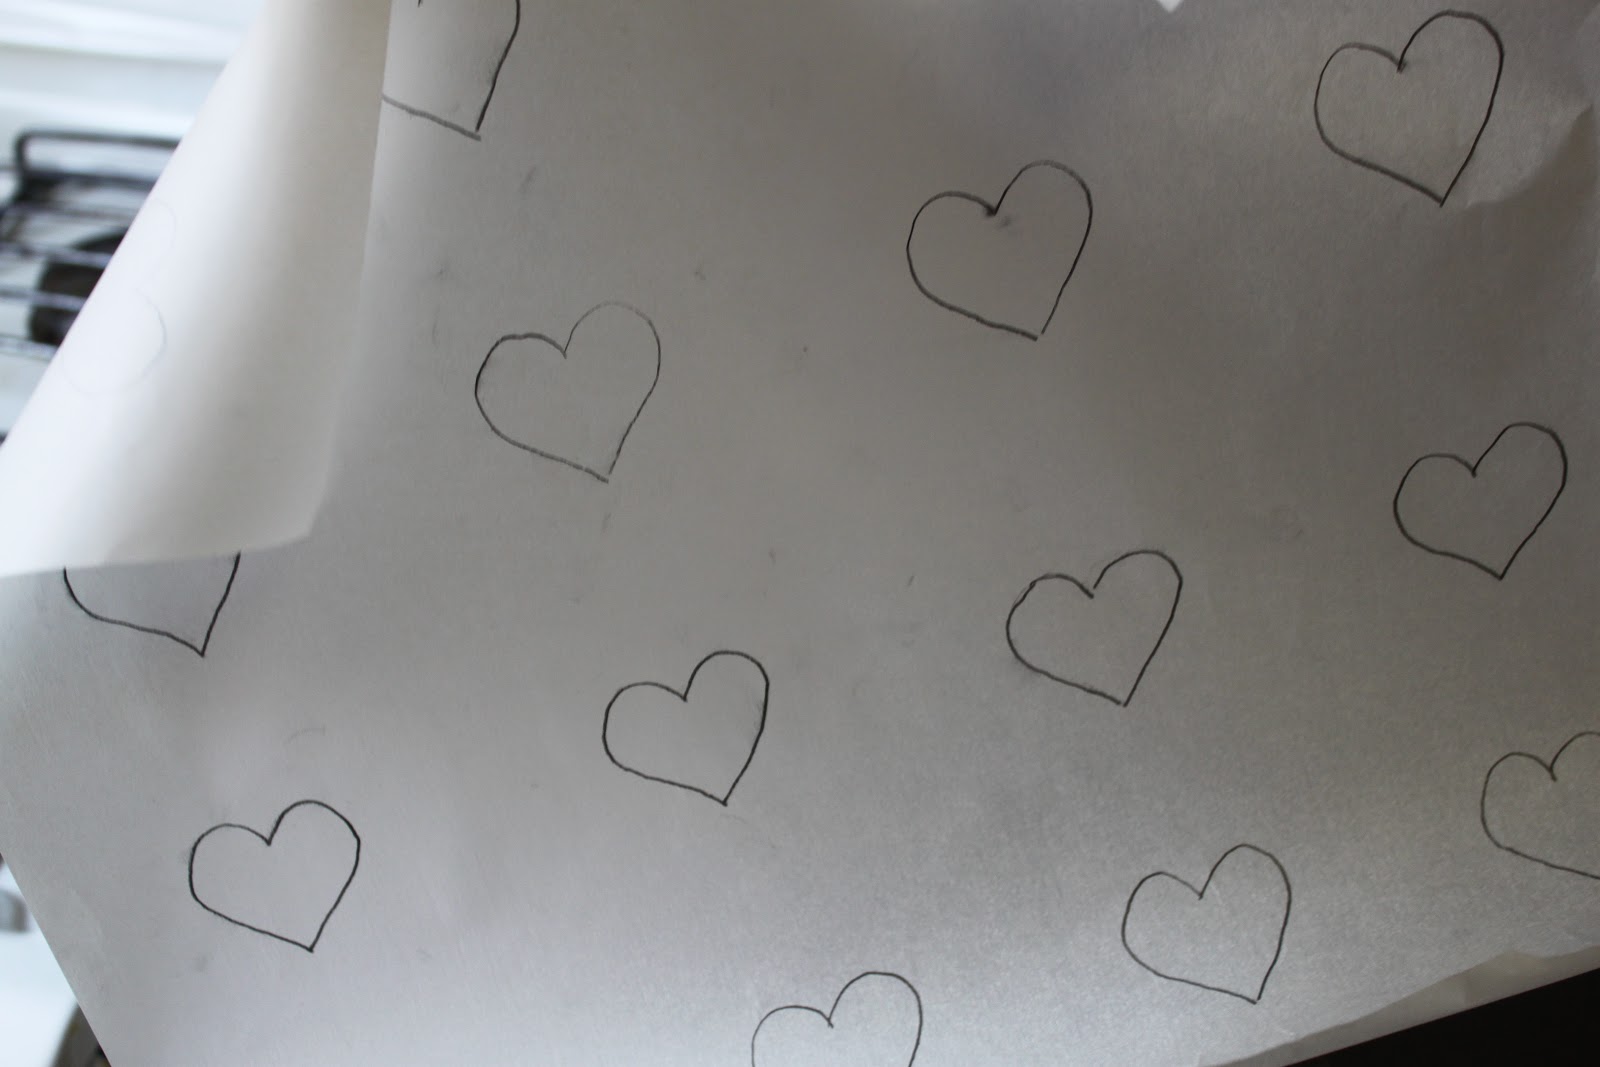
For a guideline to making heart shapes, I traced a heart on one side of the parchment paper. With the pencil side down, I piped the hearts on the other side of the paper.
Rap the baking tray on the bench firmly a couple of times to get rid of any large air bubbles, settle the shape of the macaron and help make the pied or "foot". Bake for about 16 minutes-18 minutes. (Erika's Extras: I kept the oven door slightly ajar when baking. The other macaron recipe I made said to do that and I think it helps an even baking.)
 
Check the macarons are dry by testing whether the top and the pied are firm (if the top is soft and the sides are moist, leave them a few more minutes). (Erika's Extras: I checked if the pied/bottom was firm by seeing if the macaron easily peeled from the parchment paper. If not, place back in oven.)Remove from oven and cool on baking trays, then remove and place on wire racks. When cool, sandwich with filling (see below). Refrigerate overnight for the correct soft macaron texture. They can be frozen for up to six weeks.Makes 85-90 (42-45 filled macarons)
 
Erika's Extras: I used this Martha Stewart recipe for the filling. I added honey to half and raspberry jam to the other half. While the filling was nice, I wasn't a huge fan of the flavor/consistency. I would suggest searching for a different recipe.
 
Bake well and prosper!

Tuesday, January 22, 2013

Homemade Donuts!

In an effort to keep pushing myself in the kitchen with recipes I'm not familiar with, I decided to fry something. That something ended up being donuts.

I thought I had enough time to make them before meeting friends for brunch, but I didn't realize the dough needed to rise again after cutting the shapes of the donuts. But my friends had no issues coming to my place and eating fresh donuts and THEN going for brunch. Imagine that.
These cute, doughy donuts brightened up my kitchen. They were so cute! I don't know why, but my room mate agreed that yes, they WERE cute! And just think, they then got to swim in hot oil and become delicious donuts.
I glazed a couple and handed  them over to my friends.
My room mate loved how fluffy they were so I made him model the donut. :)

I also used different toppings for some of the donuts. Creating different glazes made the making of the donuts even more fun!

If you have 3 hours on your hands, try this recipe. As long as you've worked with yeast before you'll have no problem making your own homemade donuts.
Homemade Donuts (adapted from allrecipes.com)
1/2 cup warm water (100 to 115 degrees F)
2 (.25 ounce) packages active dry yeast
1 teaspoon white sugar
3/4 cup milk
1/3 cup vegetable shortening
1/4 cup white sugar
1 teaspoon salt
2eggs
4 cups sifted all-purpose flour
2 quarts vegetable oil for frying
1 tablespoon warm water
1/2 teaspoon vanilla extract
1 cup powdered sugar, sifted
Directions


  1. Pour 1/2 cup of warm water into a small bowl, and stir in the yeast and 1 teaspoon of sugar. (Erika's Extras: Stir right away with a fork.) Allow the yeast mixture to stand until it forms a creamy foam layer on top, 5 to 10 minutes.
  2. While yeast is sitting, place milk and vegetable shortening into a small saucepan over medium-low heat and cook until the shortening has melted and the milk has tiny bubbles around the edge. Remove from heat.
  3. Place 1/4 cup of sugar and the salt into the work bowl of a large stand mixer and pour the milk and shortening into the bowl. Mix on low speed just to dissolve sugar; and allow mixture to stand until warm.
  4. Beat in the yeast mixture, eggs, and 1 cup of flour on low speed until smooth. Gradually beat in remaining flour to make a soft dough. (Erika's Extras: I felt that 4 cups of flour was a tad too much so add a little at a time with the last cup of flour. It's ok to not use it all if it doesn't seem like it needs it.)
  5. Continue beating the dough on low speed until dough leaves the sides of the bowl, 2 to 3 minutes. (Erika's Extras: This happened after the 3rd cup of flour.)
  6. Turn the dough out onto a well-floured work surface and knead until smooth and elastic, 2 or 3 more minutes.
  7. Form the dough into a ball and place into a large greased bowl. Grease the top of the dough, and cover the bowl with waxed paper. Set the bowl into a warm place; let the dough rise until doubled in size, 1 to 1 1/2 hours.
  8. Punch down the dough and roll out on a floured work surface to 1/2 inch thick. Cut doughnuts out of the dough with a 3 1/2-inch round doughnut cutter with a 1-inch smaller cutter in the center. Let the doughnuts rise on the work surface until very light and fluffy, 40 minutes to 1 hour.
  9. Heat oil in a deep-fryer or large saucepan to 350 degrees F.
  10. Gently pick up and drop the doughnuts into the hot oil, working in small batches of 2 or 3 at a time, and cook until the doughnuts are light golden brown, turning once, about 2 minutes. (Erika's Extras: I used a metal spatula to gently drop the donuts into the oil thus helping not to spill oil on myself/the counter.)
  11. Drain the doughnuts on paper towels to absorb oil.
  12. In a bowl, mix 1 tablespoon of warm water and vanilla extract, and stir in the confectioners' sugar to make a glaze. Spread a thin layer of glaze over the warm doughnuts. (Erika's Extras: I had to add more water to this glaze, but it worked very well. I also used a tiny bit of milk in a different batch which created a richer glaze.)

Bake well and prosper!

Wednesday, January 16, 2013

Macarons!

I have decided that 2013 is the year I take on more challenging recipes. Recipes that push me out of my comfort zone and hopefully, like this one, make me realize that yes, I CAN do it. It will also help me understand different techniques of baking that I haven't dabbled in yet. (Or I'll learn from my failure with the new techniques.)
Do you have any resolutions for this year? The baking one is the only one I have. I find that if it's something concrete like taking a comerical acting for camera class or doing a night of stand up comedy that I complete the resolution. However, if it's something a little less concrete like complementing people more, I fail at the resolution. Yes. I've done stand up and had a blast but giving more complements was just beyond me. (Not that I don't GIVE compliments, I just don't give them often. I often think them and never voice the thought. Thus the resolution 2 years ago to compliment more. But it just wasn't in my being. So if you DO get a compliment from me, it means even more! At least that's the way I justify my flaw. Ha!)
Speaking of flaws, I approached these macarons by researching a lot. I didn't want to start with a really demanding recipe, so I eased into macaron baking with a Martha Stewart recipe so as to avoid a flawed first go.
I have to say that for someone who doesn't have a whisk attachment, these sweet things turned out marvelous! I used Nutella and raspberry jam (not together) for the fillings. They are a tad on the sweet side, but got good reviews from the taste testers.

Things I plan to do for the next time I make them:
       1. Get a better food processor so I can get a really fine almond base.
       2. Not burn some of the first batch. (These things will burn quickly!
           Thankfully I only lost a couple to overheating.)
       3. Use more food coloring and maybe even change the flavor of the
           outsides.
       4. Use the French Macaron cook book my friend from Toulouse gave
           me. It's all in French.

So far 2013 is shaping up well in my kitchen. Here's to an adventurous year!
Parisian Macarons (from Martha Stewart)
1 1/4 cups plus 1 teaspoon powdered sugar
1 cup (4 ounces) finely ground sliced, blanched almonds
6 tablespoons fresh egg whites (from about 3 extra-large eggs)
Pinch of salt
1/4 cup granulated sugar
(your own filling)

To make the macarons: Preheat the oven to 350 degrees. In a medium bowl, whisk together confectioners' sugar and ground almonds. In the bowl of an electric mixer fitted with the whisk attachment, whip egg whites with salt on medium speed until foamy. Increase speed to high and gradually add granulated sugar. (Erika's Extras: This is the time to add the NON oil based food coloring. Add more than you think you need because the color will become a little dull in the oven.) Continue to whip until stiff glossy peaks form. (Erika's Extras: I did this with normal beaters in an electric hand mixer. It took about 8 minutes, but the peaks finally do form.) With a rubber spatula, gently fold in the confectioners' sugar mixture until completely incorporated.
 
Line baking sheets with parchment paper; set aside. (Erika's Extra: Feel free to draw circles on the parchment paper to give a guide for perfect sized macarons.) Fit a pastry bag with a 3/8-inch #4 round tip, and fill with batter. Pipe 1-inch disks onto prepared baking sheets, leaving 2 inches between cookies. The batter will spread a little. Let stand at room temperature until dry, and a soft skin forms on the tops of the macarons and the shiny surface turns dull, about 15 minutes.
 
Bake, with the door of the oven slightly ajar, until the surface of the macarons is completely dry, about 15 minutes. (Erika's Extras: Mine seemed to only need around 12 minutes in the oven.) Remove baking sheet to a wire rack and let the macarons cool completely on the baking sheet. Gently peel off the parchment. Their tops are easily crushed, so take care when removing the macarons from the parchment. (Erika's Extras: I peeled them off the parchment paper right away.) Use immediately or store in an airtight container, refrigerated for up to 2 days or frozen for up to 1 month.
 
To fill the macarons: Fill a pastry bag with the filling. Turn macarons so their flat bottoms face up. On half of them, pipe about 1 teaspoon filling. Sandwich these with the remaining macarons, flat-side down, pressing slightly to spread the filling to the edges. Refrigerate until firm, about 1 hour.
Bake well and prosper!