Showing posts with label raspberry jelly. Show all posts

Wednesday, August 27, 2014

Macarons for Diner en Blanc

Another Dîner en Blanc! I am feeling like a semi-pro for these amazing events. This time for NYC I made a center piece. (See above. I was very proud of myself for the whimsical aspect of it. Also, it's been awhile since I did any arts and crafts, so it was quite enjoyable to make!)

Last year I made "Almazing" Almond Bars and this year I wanted to keep with the white dessert theme. So, I decided to make macarons. When I picked up the pieces for the center piece, I also picked up some edible glitter dust. I must say, these were pretty!
I used organic pear preserves for the filling of the glittery ones.
 
I also decorated some with edible markers which I ended up loving the look of. Nothing like marking the name of an event on food!
These ones had raspberry preserves in them, you know, to match the font color. :)
 
My guest at the diner was a really wonderful musician friend of mine who also happens to be a foodie. I had her in charge of the meal. Check out this beautiful spread!
And that was just the first course!

Here we are enjoying it and the lovely evening. Can you spot the center piece on the table?
Once again I was asked to sing for the event which I gladly did. It's always such a magical night and I'm always happy to sing in front of 4,000 beautifully dressed people. 
I sang Summertime. I thought it was very fitting for a Monday evening in August. :) Here's a video if you'd like to check it out: Youtube Summertime
 
After singing I broke into my desserts. It was kinda like singing for supper...but I sang for sugar.

The night was even more magical than last year's (which is almost impossible since last year was so wonderful as well!) I ended up sharing my macarons with many people and everyone raved over them. (I was worried they were too sweet but people said they were just right.) After dessert my friend and I walked around a lot of the tables and even ended up making our way into the packed dance floor with our glasses of wine in hand. At the stroke of 10, we all packed up and it was like Cinderella's carriage became a pumpkin again. All the fun preparation and partying...and then life as usual...but life made just a bit more beautiful!
Macaron Recipe found here: Goodfood 
Bake well and prosper!

Monday, February 11, 2013

Heart Shaped Italian Macarons

Ever since making my first batch of macarons last month I wanted to try a different macaron recipe/technique AND attempt to make them heart shaped. Well, I did and they were a success! How cute are these heart shaped treats? Is there any way to make them cuter?
Yep! Add some pink poodles into the shot.  My room mate figured that would be cute/funny and he was right!

Then I wondered if there was any way to make these even more adorable.
Yep! Drawing Valentine's messages on them with edible marker fit the bill nicely. How cute are they? My room mate exclaimed that they looked like Sweethearts and I had to agree. 
Not into the normal Valentine's Day messages? Don't worry. I have that covered too. Here's some updated messages that I felt were very "of the times" for today's society...and also made me giggle.
Still not into Valentine's Day/love? Been burnt too many times in the past? Don't worry. I have you covered as well.
There was one broken heart out of the 80+ I made.

I am glad to say that the folks eating these enjoyed the messages AND the yummy tastes of these macarons. I used an Italian technique (which incorporates hot sugar water which helps to make the tops shiny.) I really enjoyed this recipe and plan to keep it as my go to macaron recipe.

Happy Valentine's Day!
Love,
Available and Slightly Low Maintenance.
Italian Macarons (from Good Food)
Ingredients
200g almond meal, laid out on tray to dry for 2 days (Erika's Extras: I laid the almond meal out for only overnight and it worked fine)
200g pure icing sugar, sieved
150g egg whites (from 3 to 4 large eggs), sieved and allowed to stand at room temperature overnight
1/4 tsp cream of tartar
1g dry egg-white powder (optional)
200g white sugar
50g water
Few drops food colouring (Erika's Extras: I put in extra food coloring since the color of my last macarons faded while baking.)


Method
Preheat oven to 150C (around 300F). Place almond meal and icing sugar in a food processor and pulse to get a finer consistency. Sieve through a drum sieve into a large mixing bowl. Divide egg whites in two batches, each 75 grams. Place one batch of egg whites in an electric mixer fitted with a whisk attachment, add cream of tartar and egg white powder and set aside.
Mix the remaining egg whites into almond mix to make a thick paste, then set aside. Put sugar and water in a saucepan on medium heat, stir to make sugar syrup. Insert thermometer. When thermometer reaches 110C, start whisking egg whites on low speed. Gradually increase the speed until the egg whites are thick. If the sugar syrup gets too hot before the egg whites are ready, add three teaspoons of cold water to syrup to reduce the temperature. When sugar syrup reaches 118C and the egg whites are ready, slowly pour syrup down the side of the mixer while whisking the egg whites on medium speed. Continue to mix for about 10 minutes until the meringue cools (the bowl should still feel slightly warm).
Add food colouring. Using a pastry scraper, mix the meringue into the almond meal paste — no need to be gentle. Keep mixing until the paste is supple and shiny.
Shiny!
It is important to have the correct consistency. The mixture should be oozy and lava-like. When you fold the mixture over itself, it will spread slowly. Using a pastry bag fitted with a one-centimetre plain nozzle, pipe mixture on to a lined double baking tray. Using two trays ensures even heat distribution. You can use baking paper to line the trays but I have found a silicone baking mat gives the best result. (Erika's Extras: I used parchment paper and it worked fine. I also only had one tray in the oven at a time which was fine as well.)
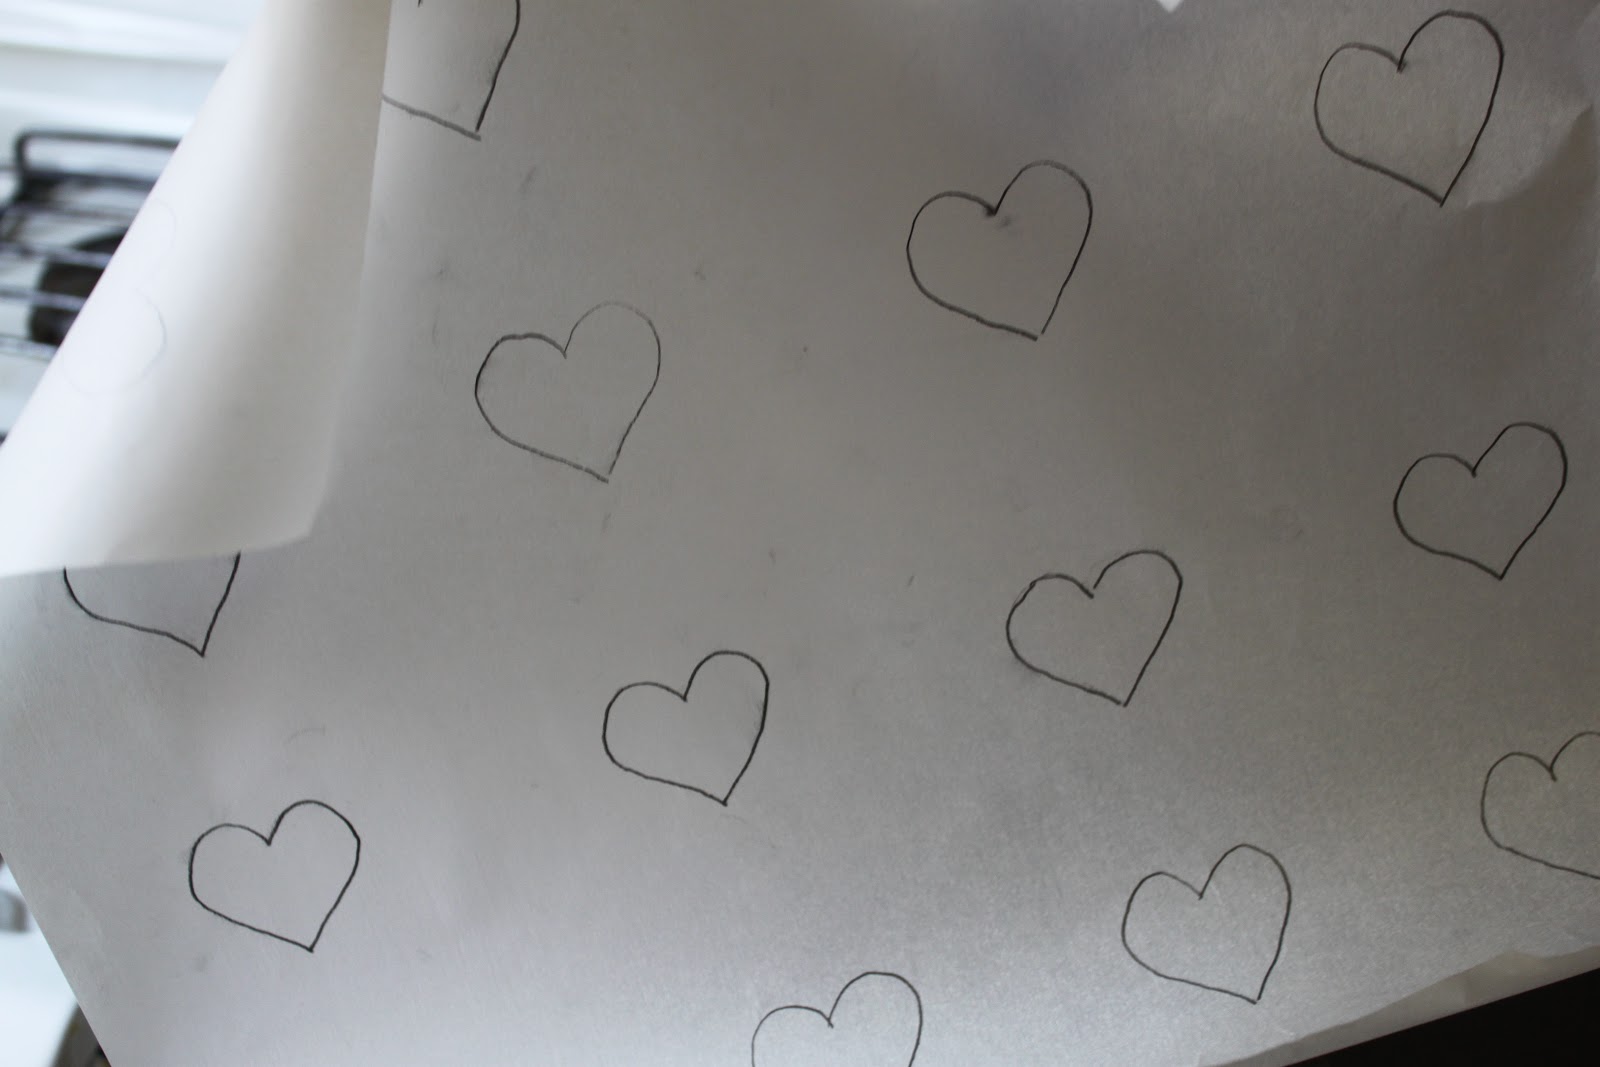
For a guideline to making heart shapes, I traced a heart on one side of the parchment paper. With the pencil side down, I piped the hearts on the other side of the paper.
Rap the baking tray on the bench firmly a couple of times to get rid of any large air bubbles, settle the shape of the macaron and help make the pied or "foot". Bake for about 16 minutes-18 minutes. (Erika's Extras: I kept the oven door slightly ajar when baking. The other macaron recipe I made said to do that and I think it helps an even baking.)
 
Check the macarons are dry by testing whether the top and the pied are firm (if the top is soft and the sides are moist, leave them a few more minutes). (Erika's Extras: I checked if the pied/bottom was firm by seeing if the macaron easily peeled from the parchment paper. If not, place back in oven.)Remove from oven and cool on baking trays, then remove and place on wire racks. When cool, sandwich with filling (see below). Refrigerate overnight for the correct soft macaron texture. They can be frozen for up to six weeks.Makes 85-90 (42-45 filled macarons)
 
Erika's Extras: I used this Martha Stewart recipe for the filling. I added honey to half and raspberry jam to the other half. While the filling was nice, I wasn't a huge fan of the flavor/consistency. I would suggest searching for a different recipe.
 
Bake well and prosper!

Wednesday, January 16, 2013

Macarons!

I have decided that 2013 is the year I take on more challenging recipes. Recipes that push me out of my comfort zone and hopefully, like this one, make me realize that yes, I CAN do it. It will also help me understand different techniques of baking that I haven't dabbled in yet. (Or I'll learn from my failure with the new techniques.)
Do you have any resolutions for this year? The baking one is the only one I have. I find that if it's something concrete like taking a comerical acting for camera class or doing a night of stand up comedy that I complete the resolution. However, if it's something a little less concrete like complementing people more, I fail at the resolution. Yes. I've done stand up and had a blast but giving more complements was just beyond me. (Not that I don't GIVE compliments, I just don't give them often. I often think them and never voice the thought. Thus the resolution 2 years ago to compliment more. But it just wasn't in my being. So if you DO get a compliment from me, it means even more! At least that's the way I justify my flaw. Ha!)
Speaking of flaws, I approached these macarons by researching a lot. I didn't want to start with a really demanding recipe, so I eased into macaron baking with a Martha Stewart recipe so as to avoid a flawed first go.
I have to say that for someone who doesn't have a whisk attachment, these sweet things turned out marvelous! I used Nutella and raspberry jam (not together) for the fillings. They are a tad on the sweet side, but got good reviews from the taste testers.

Things I plan to do for the next time I make them:
       1. Get a better food processor so I can get a really fine almond base.
       2. Not burn some of the first batch. (These things will burn quickly!
           Thankfully I only lost a couple to overheating.)
       3. Use more food coloring and maybe even change the flavor of the
           outsides.
       4. Use the French Macaron cook book my friend from Toulouse gave
           me. It's all in French.

So far 2013 is shaping up well in my kitchen. Here's to an adventurous year!
Parisian Macarons (from Martha Stewart)
1 1/4 cups plus 1 teaspoon powdered sugar
1 cup (4 ounces) finely ground sliced, blanched almonds
6 tablespoons fresh egg whites (from about 3 extra-large eggs)
Pinch of salt
1/4 cup granulated sugar
(your own filling)

To make the macarons: Preheat the oven to 350 degrees. In a medium bowl, whisk together confectioners' sugar and ground almonds. In the bowl of an electric mixer fitted with the whisk attachment, whip egg whites with salt on medium speed until foamy. Increase speed to high and gradually add granulated sugar. (Erika's Extras: This is the time to add the NON oil based food coloring. Add more than you think you need because the color will become a little dull in the oven.) Continue to whip until stiff glossy peaks form. (Erika's Extras: I did this with normal beaters in an electric hand mixer. It took about 8 minutes, but the peaks finally do form.) With a rubber spatula, gently fold in the confectioners' sugar mixture until completely incorporated.
 
Line baking sheets with parchment paper; set aside. (Erika's Extra: Feel free to draw circles on the parchment paper to give a guide for perfect sized macarons.) Fit a pastry bag with a 3/8-inch #4 round tip, and fill with batter. Pipe 1-inch disks onto prepared baking sheets, leaving 2 inches between cookies. The batter will spread a little. Let stand at room temperature until dry, and a soft skin forms on the tops of the macarons and the shiny surface turns dull, about 15 minutes.
 
Bake, with the door of the oven slightly ajar, until the surface of the macarons is completely dry, about 15 minutes. (Erika's Extras: Mine seemed to only need around 12 minutes in the oven.) Remove baking sheet to a wire rack and let the macarons cool completely on the baking sheet. Gently peel off the parchment. Their tops are easily crushed, so take care when removing the macarons from the parchment. (Erika's Extras: I peeled them off the parchment paper right away.) Use immediately or store in an airtight container, refrigerated for up to 2 days or frozen for up to 1 month.
 
To fill the macarons: Fill a pastry bag with the filling. Turn macarons so their flat bottoms face up. On half of them, pipe about 1 teaspoon filling. Sandwich these with the remaining macarons, flat-side down, pressing slightly to spread the filling to the edges. Refrigerate until firm, about 1 hour.
Bake well and prosper!