Showing posts with label Powdered Sugar. Show all posts

Monday, April 14, 2014

Dark Chocolate Ganache Crepe Cake

This cake was so yummy that I really don't have much else to say about it.
Ok. Ok. I'm kidding. I can say tons about it! First, it was quite a process to put together. I ended up having tons of help making it though since I was visiting family at the time. 
This was my assembly line. Quite a mess (so it came out a success!)
 
The robust dark chocolate was slightly mellowed when added to heavy whipping cream. That ganache nicely complemented the eggy crepes. Altogether, there wasn't one complaint about this cake from the many taste-testers.
 
I can't wait to make it again. (I might do a mini-version in the future.)
 
PS Check out my tips on how to make it in less time.
Chocolate Ganache Crepe Cake (found on Completely Delicious)
Ingredients:
6 tablespoons (85 grams) unsalted butter
3 cups (710 ml) whole milk
6 large eggs
1 1/2 cups (188 grams) all-purpose flour
1/4 cup + 2 tablespoons (75 grams) sugar
Pinch of salt
 
For the whipped ganache:
10 ounces (285 grams) dark chocolate, broken into pieces
2 cups (475 ml) heavy cream
 
1. In a medium saucepan over medium heat, bring the heavy cream to a simmer. Break the dark chocolate in a medium bowl. Pour the heated heavy cream over the chocolate and let sit for 1 minute. Whisk until smooth and chill in fridge until ready to use.
 
2.Melt the butter in a small saucepan over medium low heat. Continue to cook, while stirring occasionally, until browned. Set aside and let cool slightly.
 
3. Meanwhile, heat the milk in another saucepan until steaming and small bubbles appear at the edges. Set aside and let cool slightly.
 
4. In the bowl of a stand mixer fitted with a whisk attachment or with a hand-held mixer, mix the eggs, flour, sugar, and salt until combined. While mixing on low speed, add the butter and milk slowly until incorporated.
 
5. Heat a 9-inch skillet over medium heat and grease with a small amount of butter. Add approximately 1/3 cup of batter to the skillet and swirl to coat the pan evenly. Cook for a few minutes until edges begin to brown. Flip and cook for an additional minute. (Erika's Extras: I found it easiest to shake the pan a little and then flip in air, but feel free to use a spatula to turn it.) Repeat until the batter is gone, stacking crepes and letting them cool to room temperature.
 
6. Take ganache out of fridge and whip until there are some peaks.
 
7. To make the cake, layer the crepes with a thin coating of chocolate ganache. Garnish cake with powdered sugar or cocoa, if desired, and let chill for a little bit before serving.
Bake well and prosper!

Monday, February 3, 2014

White Chocolate Butterscotch Buddies

I was interested in trying this twist on muddy buddies (aka puppy chow.) I figured it was the perfect fodder to bring to a Super Bowl party. It was always a beloved football party staple where I grew up in Texas.
 
I was shocked to find that no one at the party I went to yesterday was familiar with muddy buddies/puppy chow. However, I wasn't shocked to hear that they loved this dessert and kept going back for more. 
My friend above was nice enough to be a hand model for my photo shoot yesterday. He's also a professional model, so this came naturally for him. ;) I posted a photo of him posing with the dessert on my Facebook page. Have you liked my page yet? I post different photos and sometimes just some plain silly things on my FB page. You should definitely check it out: https://www.facebook.com/LifesTooShortToSkipDessert
 
Oh, and you should check out this dessert if you're a big fan of butterscotch and sugar!
White Chocolate Butterscotch Buddies (found at Creme de la Crumb)
6 cups rice chex cereal
12 ounces white chocolate chips, melted
1 small box butterscotch pudding mix (dry)
⅓ cup powdered sugar
 
Place the rice chex in a large bowl. In a double boiler, melt white chocolate. (Erika's extras: It doesn't become very syrupy. It becomes gummy and malleable.) Pour/stir in melted chocolate over cereal. Stir to coat all cereal in chocolate. (Erika's Extras: I had to do this in a couple of stages due to dealing with putty like chocolate.) Transfer to a large zip-lock bag. In a small bowl combine pudding mix and powdered sugar and whisk together. Pour into the plastic bag with the cereal mix and zip to close. Shake the bag to coat the cereal well with the sugar mix. Allow chocolate to harden, then break cereal into smaller chunks. Store in airtight container.
Bake well and prosper!

Thursday, December 26, 2013

Pistachio Snowball Cookies

Whew! I made it. I made it through Christmas. Within a span of 20 hours I sang 2 rehearsals, 1 concert, and 3 church services. My voice was pretty tired come Christmas day, but I made it through all the carols.
 
It helped to be singing in a "new to me", beautiful church. Check out this pretty church:
And the church's pretty crèche
 
After all the singing I did, I got to relax at my friends' place where they treated me to a scrumptious meal and I treated them to sangria and these pistachio snowball cookies.
I'm not a big fan of snowball cookies aka Swedish Cookies, Mexican Wedding Cookies, and Russian Tea Cookies. However, I did enjoy the pistachio twist with this recipe since I like pistachios. The pistachio flavor was nicely prevalent.
 
So, did you survive through Christmas? Did your survival involve cookies?
Pistachio Snowball Cookies (found on Completely Delicious <~Created the recipe)
 
1/4 cup (50 grams) granulated sugar
3/4 cup (170 grams) unsalted butter, at room temperature
1 teaspoon vanilla extract
1 1/2 cup (180 grams) all-purpose flour
1 1/2 cup (180 grams) pistachios, very finely chopped
Pinch of salt
Powdered sugar
 
Preheat oven to 325 degrees F. Beat the butter and sugar together in a big bowl on medium high speed until creamy and pale in color. Add the vanilla extract. Add the flour, pistachios and salt, and mix until just combined. Shape a tablespoon of dough into a round shape and place on a baking sheet, about 1 inch apart. (Feel free to use parchment paper on the cookie sheet.) Bake until cookies just begin to turn golden brown, about 15 minutes. Let cool on pan enough to touch but still warm, then roll in powdered sugar. Let cool completely and then roll in powdered sugar again.
 
Erika's Extras: I found the dough a little hard to mold. I had to constantly squish it to form the mounds, but it eventually did and didn't fall apart once baked.
Bake well and prosper!
 

Tuesday, January 22, 2013

Homemade Donuts!

In an effort to keep pushing myself in the kitchen with recipes I'm not familiar with, I decided to fry something. That something ended up being donuts.

I thought I had enough time to make them before meeting friends for brunch, but I didn't realize the dough needed to rise again after cutting the shapes of the donuts. But my friends had no issues coming to my place and eating fresh donuts and THEN going for brunch. Imagine that.
These cute, doughy donuts brightened up my kitchen. They were so cute! I don't know why, but my room mate agreed that yes, they WERE cute! And just think, they then got to swim in hot oil and become delicious donuts.
I glazed a couple and handed  them over to my friends.
My room mate loved how fluffy they were so I made him model the donut. :)

I also used different toppings for some of the donuts. Creating different glazes made the making of the donuts even more fun!

If you have 3 hours on your hands, try this recipe. As long as you've worked with yeast before you'll have no problem making your own homemade donuts.
Homemade Donuts (adapted from allrecipes.com)
1/2 cup warm water (100 to 115 degrees F)
2 (.25 ounce) packages active dry yeast
1 teaspoon white sugar
3/4 cup milk
1/3 cup vegetable shortening
1/4 cup white sugar
1 teaspoon salt
2eggs
4 cups sifted all-purpose flour
2 quarts vegetable oil for frying
1 tablespoon warm water
1/2 teaspoon vanilla extract
1 cup powdered sugar, sifted
Directions


  1. Pour 1/2 cup of warm water into a small bowl, and stir in the yeast and 1 teaspoon of sugar. (Erika's Extras: Stir right away with a fork.) Allow the yeast mixture to stand until it forms a creamy foam layer on top, 5 to 10 minutes.
  2. While yeast is sitting, place milk and vegetable shortening into a small saucepan over medium-low heat and cook until the shortening has melted and the milk has tiny bubbles around the edge. Remove from heat.
  3. Place 1/4 cup of sugar and the salt into the work bowl of a large stand mixer and pour the milk and shortening into the bowl. Mix on low speed just to dissolve sugar; and allow mixture to stand until warm.
  4. Beat in the yeast mixture, eggs, and 1 cup of flour on low speed until smooth. Gradually beat in remaining flour to make a soft dough. (Erika's Extras: I felt that 4 cups of flour was a tad too much so add a little at a time with the last cup of flour. It's ok to not use it all if it doesn't seem like it needs it.)
  5. Continue beating the dough on low speed until dough leaves the sides of the bowl, 2 to 3 minutes. (Erika's Extras: This happened after the 3rd cup of flour.)
  6. Turn the dough out onto a well-floured work surface and knead until smooth and elastic, 2 or 3 more minutes.
  7. Form the dough into a ball and place into a large greased bowl. Grease the top of the dough, and cover the bowl with waxed paper. Set the bowl into a warm place; let the dough rise until doubled in size, 1 to 1 1/2 hours.
  8. Punch down the dough and roll out on a floured work surface to 1/2 inch thick. Cut doughnuts out of the dough with a 3 1/2-inch round doughnut cutter with a 1-inch smaller cutter in the center. Let the doughnuts rise on the work surface until very light and fluffy, 40 minutes to 1 hour.
  9. Heat oil in a deep-fryer or large saucepan to 350 degrees F.
  10. Gently pick up and drop the doughnuts into the hot oil, working in small batches of 2 or 3 at a time, and cook until the doughnuts are light golden brown, turning once, about 2 minutes. (Erika's Extras: I used a metal spatula to gently drop the donuts into the oil thus helping not to spill oil on myself/the counter.)
  11. Drain the doughnuts on paper towels to absorb oil.
  12. In a bowl, mix 1 tablespoon of warm water and vanilla extract, and stir in the confectioners' sugar to make a glaze. Spread a thin layer of glaze over the warm doughnuts. (Erika's Extras: I had to add more water to this glaze, but it worked very well. I also used a tiny bit of milk in a different batch which created a richer glaze.)

Bake well and prosper!

Wednesday, January 16, 2013

Macarons!

I have decided that 2013 is the year I take on more challenging recipes. Recipes that push me out of my comfort zone and hopefully, like this one, make me realize that yes, I CAN do it. It will also help me understand different techniques of baking that I haven't dabbled in yet. (Or I'll learn from my failure with the new techniques.)
Do you have any resolutions for this year? The baking one is the only one I have. I find that if it's something concrete like taking a comerical acting for camera class or doing a night of stand up comedy that I complete the resolution. However, if it's something a little less concrete like complementing people more, I fail at the resolution. Yes. I've done stand up and had a blast but giving more complements was just beyond me. (Not that I don't GIVE compliments, I just don't give them often. I often think them and never voice the thought. Thus the resolution 2 years ago to compliment more. But it just wasn't in my being. So if you DO get a compliment from me, it means even more! At least that's the way I justify my flaw. Ha!)
Speaking of flaws, I approached these macarons by researching a lot. I didn't want to start with a really demanding recipe, so I eased into macaron baking with a Martha Stewart recipe so as to avoid a flawed first go.
I have to say that for someone who doesn't have a whisk attachment, these sweet things turned out marvelous! I used Nutella and raspberry jam (not together) for the fillings. They are a tad on the sweet side, but got good reviews from the taste testers.

Things I plan to do for the next time I make them:
       1. Get a better food processor so I can get a really fine almond base.
       2. Not burn some of the first batch. (These things will burn quickly!
           Thankfully I only lost a couple to overheating.)
       3. Use more food coloring and maybe even change the flavor of the
           outsides.
       4. Use the French Macaron cook book my friend from Toulouse gave
           me. It's all in French.

So far 2013 is shaping up well in my kitchen. Here's to an adventurous year!
Parisian Macarons (from Martha Stewart)
1 1/4 cups plus 1 teaspoon powdered sugar
1 cup (4 ounces) finely ground sliced, blanched almonds
6 tablespoons fresh egg whites (from about 3 extra-large eggs)
Pinch of salt
1/4 cup granulated sugar
(your own filling)

To make the macarons: Preheat the oven to 350 degrees. In a medium bowl, whisk together confectioners' sugar and ground almonds. In the bowl of an electric mixer fitted with the whisk attachment, whip egg whites with salt on medium speed until foamy. Increase speed to high and gradually add granulated sugar. (Erika's Extras: This is the time to add the NON oil based food coloring. Add more than you think you need because the color will become a little dull in the oven.) Continue to whip until stiff glossy peaks form. (Erika's Extras: I did this with normal beaters in an electric hand mixer. It took about 8 minutes, but the peaks finally do form.) With a rubber spatula, gently fold in the confectioners' sugar mixture until completely incorporated.
 
Line baking sheets with parchment paper; set aside. (Erika's Extra: Feel free to draw circles on the parchment paper to give a guide for perfect sized macarons.) Fit a pastry bag with a 3/8-inch #4 round tip, and fill with batter. Pipe 1-inch disks onto prepared baking sheets, leaving 2 inches between cookies. The batter will spread a little. Let stand at room temperature until dry, and a soft skin forms on the tops of the macarons and the shiny surface turns dull, about 15 minutes.
 
Bake, with the door of the oven slightly ajar, until the surface of the macarons is completely dry, about 15 minutes. (Erika's Extras: Mine seemed to only need around 12 minutes in the oven.) Remove baking sheet to a wire rack and let the macarons cool completely on the baking sheet. Gently peel off the parchment. Their tops are easily crushed, so take care when removing the macarons from the parchment. (Erika's Extras: I peeled them off the parchment paper right away.) Use immediately or store in an airtight container, refrigerated for up to 2 days or frozen for up to 1 month.
 
To fill the macarons: Fill a pastry bag with the filling. Turn macarons so their flat bottoms face up. On half of them, pipe about 1 teaspoon filling. Sandwich these with the remaining macarons, flat-side down, pressing slightly to spread the filling to the edges. Refrigerate until firm, about 1 hour.
Bake well and prosper!

Tuesday, December 11, 2012

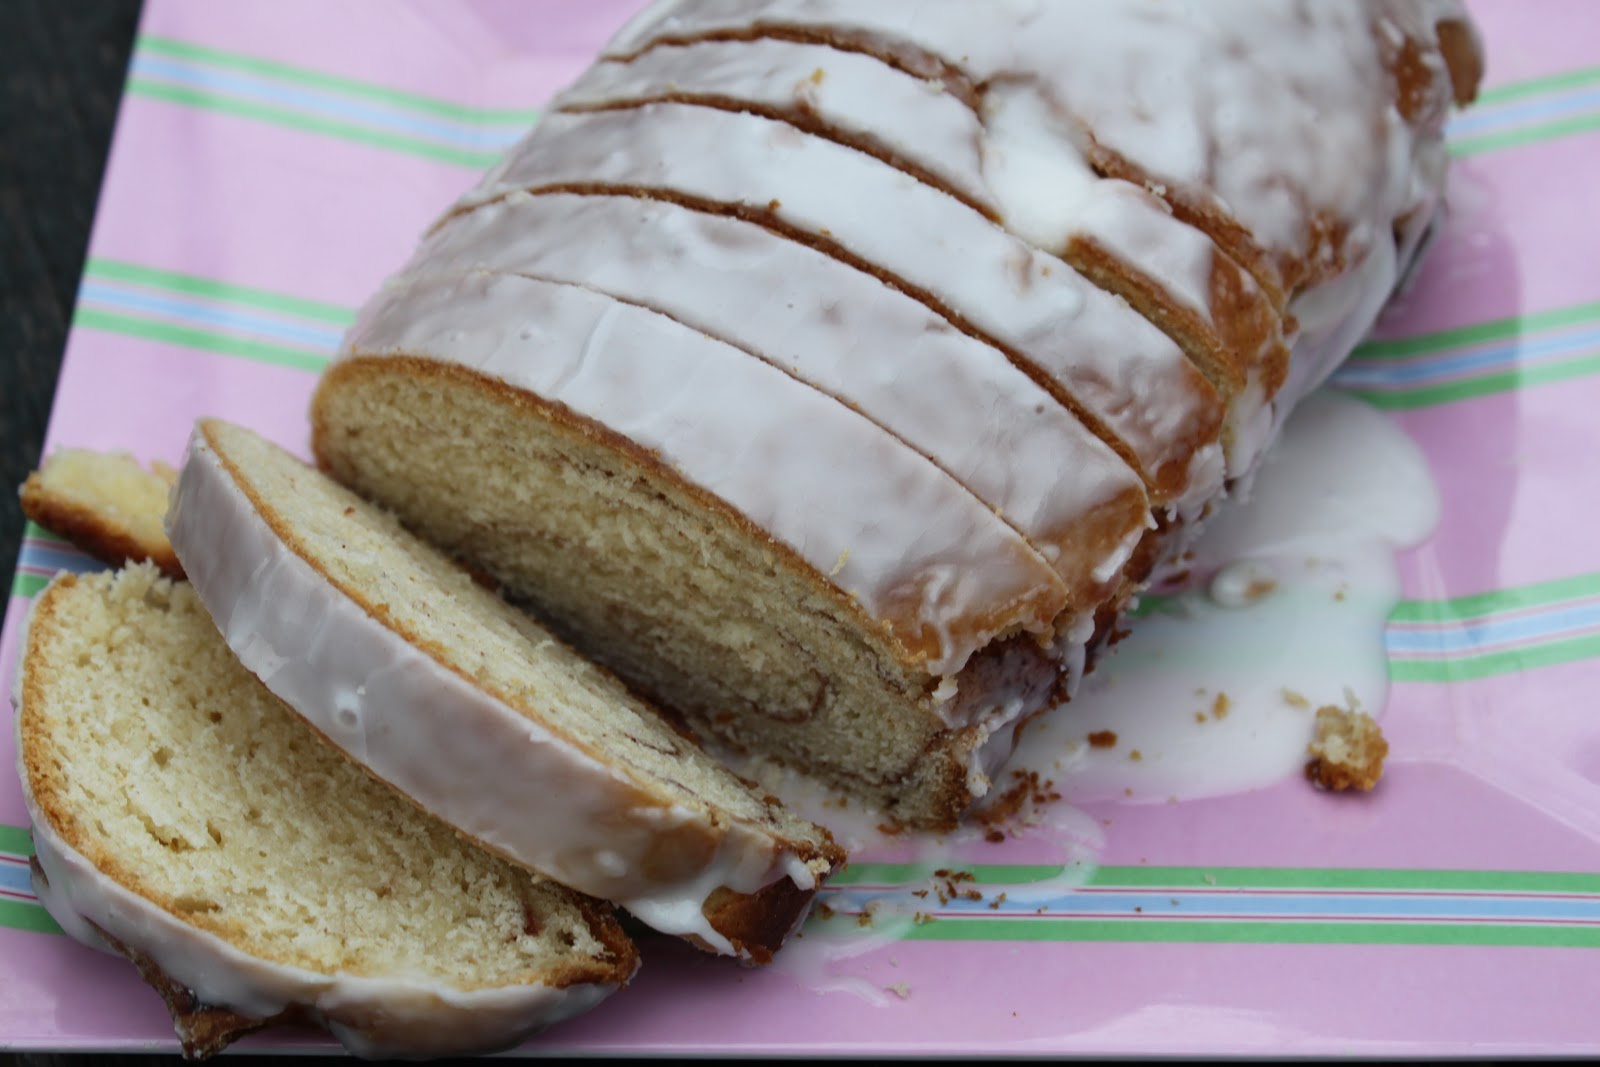
Overnight Coffee Loaves

So, last week I had a pretty important birthday.
Watch out New York City! You just gained another 30 year old female! I was very excited to leave my 20s behind. Not that they were bad. But I think there's something great about being in your 30s in NYC. I guess I just feel that this city caters to a slightly older crowd.
 
Speaking of catering to crowds, I baked up a storm to feed my friends for my birthday party! (I'll be posting all my baked goods this week, so keep your eyes out for everything.)
 
To usher in my 30s I decided to give back to my favorite city. I held a two part party. First part was picking up trash in Astoria Park. Second part was meeting at a bar. Those friends who volunteered were treated to a free happy hour on me. Those who decided to not volunteer and just meet at the bar paid for their own drinks. People really enjoyed this concept and everyone understood the rules.
 
Well, I couldn't have people picking up trash on an empty stomach now could I?
 
Since I had taken some days off of work to celebrate my birthday, I decided that I finally had enough time and I was finally mature enough to make Overnight Coffee Loaf.
 
You see, this is from my Mom's Favorite Recipes Cook Book. And all of my siblings and I LOVE this bread. So, I had some trepidations about making it. This bread had a lot of history behind it and I didn't want to mess it up.
 
Guess what. Within the first steps of the recipe I was a mess.
Thus, the bread turned out FANTASTIC.
I was fortunate enough to have a friend over who got to taste test it with me right when it came out of the oven. It was to die for. We ate a whole mini loaf. (I couldn't find my other loaf pan so I improvised. See below.)
I was very excited to share it with my volunteers before picking up trash. Too bad it was a gloomy and somewhat cold day. This bread is just so much better warm than cold. Nobody had a problem eating it though. :) And tons of trash was picked up! (Must have been the boost of sugar that helped. Here's a little bit of the trash that was found.)
Yes, that's a prescription bottle on the bench filled with lithium. Found. In. A. PARK! Eek!

So, as you can see, the first part of my birthday party was a success. Many of my friends told me that they didn't expect to have so much fun picking up trash. Ha!

Second part of party and more recipes from my birthday week to come. For now, here's the recipe for this delicious bread.
Overnight Coffee Loaf (from my Mom's Best Recipes Cook Book)
Makes 2 loaves of bread

1 pkg dry active yeast (or scant 1 T)
1/4 C warm water
4 C flour
1/4 C sugar
1 t salt
1 C butter or margarine (softened)
3 egg yolks
1 C lukewarm milk, scalded and cooled
2 T melted butter or margarine
1/2 C sugar
1 1/2 t cinnamon
powdered sugar glaze (powdered sugar and milk)

Soften butter. Cut in flour, 1/4 C sugar, and salt until mixture looks like a pie crust mixture. Dissolve yeast in warm water and stir with a fork so no big lumps form. Once stirred, mix in yeast, egg yolks, and milk. Cover; refrigerate at least 8 hours or overnight. Grease 2 loaf pans. Divide dough in half; roll out each half into an oblong shape that will fit into your loaf pan length wise when rolled up. Does not need to be super thin. Brush one side of each flattened dough with 1 T melted butter. Mix sugar and cinnamon. Sprinkle half on each half. Roll up dough, placing seam side down in pan. Cover and let rise 2 hours; dough will not double in size. Bake 350 for 1 hour. Remove from pan and let cool for a couple of minutes. Frost with powdered sugar glaze (mix 1 C powdered sugar and a tiny bit of milk.)
Erika's Extras: Add more cinnamon and sugar for a bolder cinnamon flavor in the bread.
 
Bake well and prosper!

Thursday, November 29, 2012

Swedish Cookies

It's been a week since Thanksgiving! Feels like much longer than that. A week ago I watched a monkey flying.
A frog floating.
A cat hovering.
I saw girls who can soar through the air too!
And it all finished with the man in a flying sled.
No wonder this past week has FLOWN by. ;)
 
Last week I was lucky enough to receive these Swedish Cookies from my mom (via my dad who brought them up with him when he visited.)
 
When I was younger these cookies were not my favorite because I was more focused on the chocolate and super sweet cookies. But now that I'm older and my taste buds have grown to love a lot more things, I really enjoyed eating these cookies. Thanks mom!
Swedish Cookies (from my Mom's Best Recipes Cookbook)
1 C butter
½ C powdered sugar
1¾ C flour
½ C chopped pecans (or a little more)
1 t vanilla
Cream butter well; add remaining ingredients. Roll into balls about 1" in diameter. Bake at 350°
for 15 min. While still a little warm, roll in powdered sugar.
 
(made by guest baker: my mom)
Bake well and prosper!

Thursday, December 8, 2011

Viennese Chocolate Spice Cookies

It's the most wonderful time of the year! Wait...is it? Is it really the Christmas season? With 17 days to go, I guess it is! It approached quickly and then with all the unseasonably warm weather NYC has had, it hasn't seemed like it SHOULD be Christmas. The cold weather I woke up to this morning definitely helped to reassure me that indeed, it's Christmastime!

The lights that are up and the Christmas decorations in store windows and on houses also help get me in the Christmas spirit.

And the holiday music playing in stores helps.

And the elves making my bed. Wait, what? There are no such things as elves? Well that explains why my bed and room are so messy!

Also, all the goodies showing up at the office has helped get me to believe that Christmas is near.

Need a good cookie to bring in to work? I suggest these Viennese Chocolate Spice Cookies. They can be made crispy or slightly chewy, and the combo of chocolate along with a slight hint of spices makes them perfect for winter.

I hope you are preparing for Christmas and enjoying the season!
Viennese Chocolate Spice Cookies (adapted from One Perfect Bite)
Ingredients:
1-1/2 cups flour, plus additional for dusting the work surface
3/4 cup cocoa powder, preferably Dutch-process
1 teaspoon baking powder
1/4 teaspoon salt
6 ounces cool, unsalted butter, cut into small pieces (1-1/2 sticks)
1 cup sugar
1-1/4 teaspoons freshly ground black pepper, divided use
1/4 teaspoon ground allspice
1 egg, room temperature
2 teaspoons vanilla extract

Directions:
1) Mix flour, cocoa powder, baking powder, and salt in a medium bowl until well combined. Set aside.
2) Using a stand mixer on medium speed, beat butter to soften, about 1 minute. Add sugar and beat until light and fluffy. If mixture is gritty beat an additional 2 minutes.
3) Beat in 3/4 teaspoon of pepper and all of allspice. Beat in egg and vanilla extract until smooth. Add in the flour mixture. Scrape down sides of bowl as needed.
4) Lightly dust work surface with flour and turn dough onto it. Roll into a 9-inch log. Wrap in plastic and refrigerate about 3 hours.
5) Position oven racks in upper and lower thirds of oven. Preheat to 375 degrees F.
6) Slice log into 1/4 inch-thick slices and place on sheet about 1 inch apart. Bake for 6 minutes then rotate sheets top to bottom and front to back. Bake for 6 more minutes until slightly puffed or springy to touch. Cool for 2 minutes in pans, then transfer to wire racks to cool completely.
7) Mix confectioners’ sugar and remaining 1/2 teaspoon black pepper in a small bowl. Sift mixture over completely cooled cookies. Yield: 3 dozen cookies.
Bake well and prosper!