Showing posts with label Mom's Best Recipes. Show all posts

Monday, February 10, 2014

Caramel Rolls

I did it! I finally made my Mom's caramel roll recipe! I wanted to make it last year when I was trying to "challenge myself" in the kitchen, but I just never had the time/the right occasion to make it.
 
The recipe takes about 4.5 hours altogether and involves yeast! (I'm still slightly scared about working with yeast even though I've made these amazing donuts, this heavenly overnight coffee loaf, these delicious croissants, and this yummy from scratch monkey bread. You'd think I'd feel like a pro by now, but I don't. I still think yeast is finicky!)
 
I had to call my Mom twice to clarify some parts of the recipe and she admitted that she didn't have a real recipe for it. She had to kind of make it up when my brother asked for it a couple of years ago. Well, her slightly made up recipe has been delighting me for years and now I've "conquered" it!
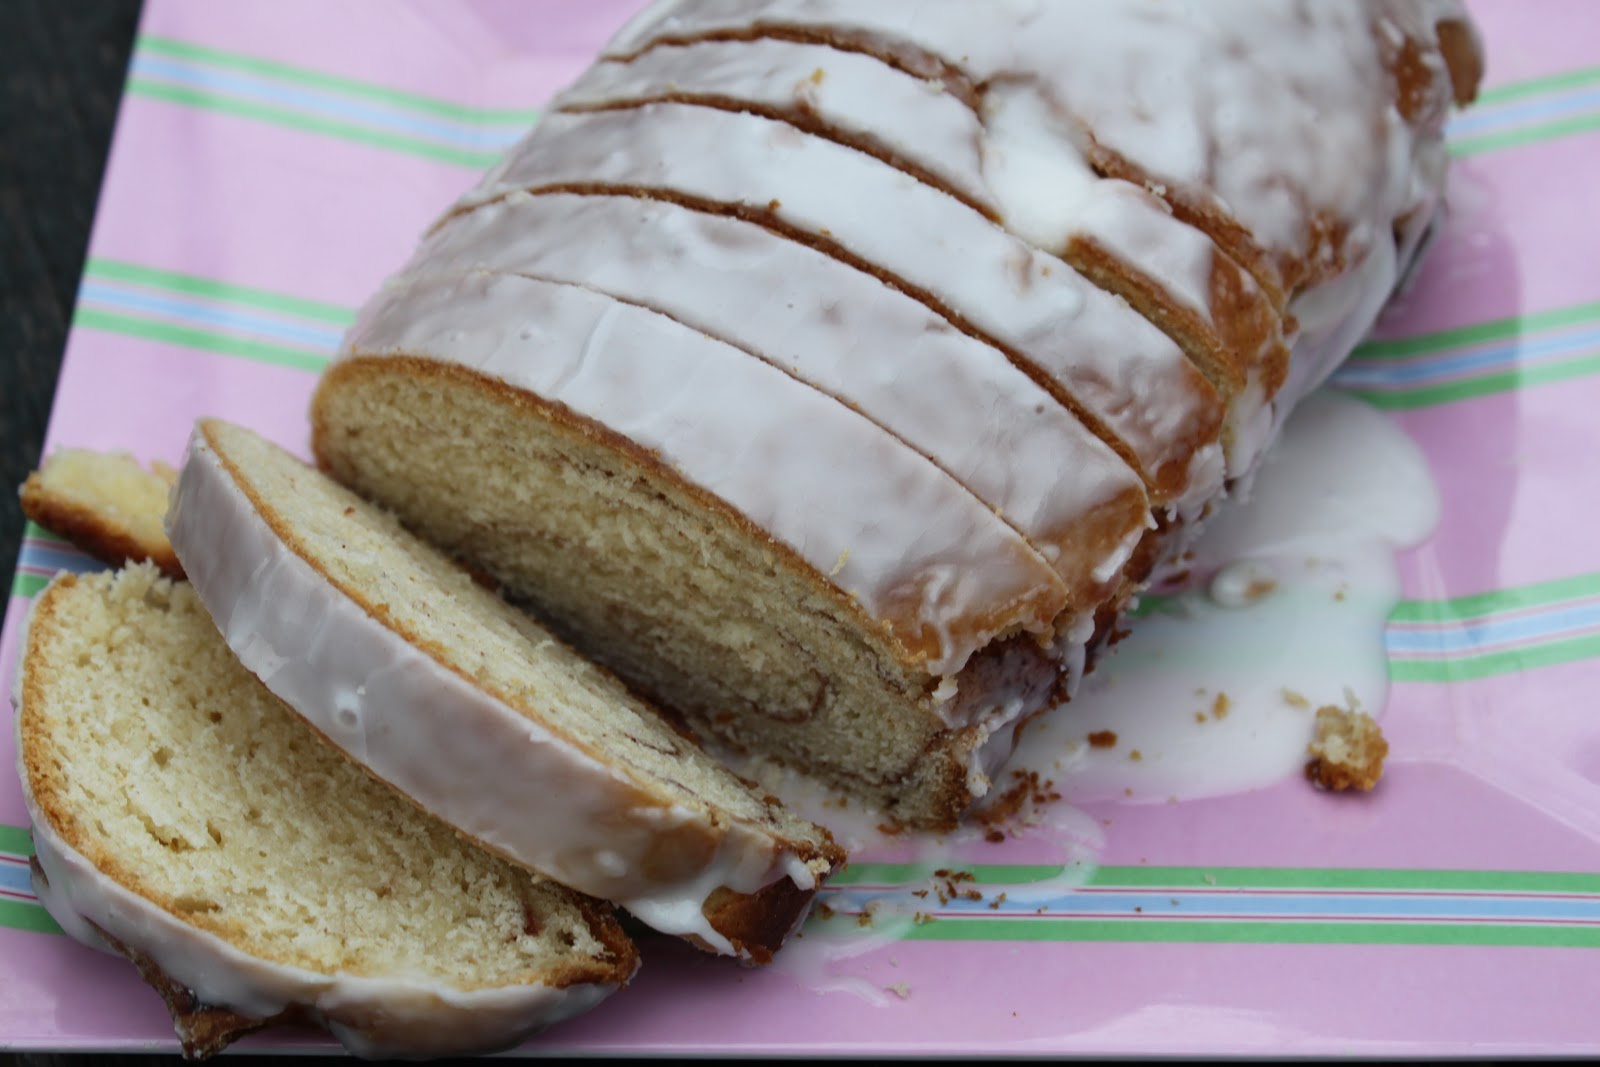
Isn't it beautiful? So shiny and caramel-y?
 
I also tried something special with the recipe for Valentine's Day. I made the other dish of rolls with red colored caramel and tried to shape the rolls into hearts. Can you see the heart?
I think the red color scared my taste-testers seeing the natural colored one was eaten first. I don't blame them. As it turns out, the red dye slightly messed with the texture of the caramel.
 
But both versions tasted great! I must admit that I think my mom makes them better, but hey, she has more years of experience on me!
 
Oh, and in case you have 4.5 hours to make rolls, here's what they taste like: cinnamon rolls with caramel and pecans on top instead of frosting. Yum! 
Caramel Rolls (adapted from my Mom's Best Recipes Cookbook)
Ingredients
3/4 C scalded milk
1/4 C shortening
1 scant T yeast (1 packet should do)
3/4 C lukewarm water
1/2 C sugar
1 t salt
1 egg
4-4 1/2 C flour (see directions)
1/2 C light syrup
1 C brown sugar
4 T butter
1/2 C chopped pecans.
1 C cinnamon and sugar

Pour hot milk over shortening in a mixing bowl; let cool to lukewarm. Dissolve yeast in water (100-110 degrees F). Yeast should be good to use after about 5 minutes (there will be some foam on top of the water.) Mix these together along with the sugar, salt, egg, and 2 C flour (not the entire amount.) Beat with electric mixer until there are air bubbles appearing in the batter. Cover the bowl with a cloth and let rise for 1/2 hour. (It might not rise much. This is ok.)

Add the other 2-2 1/2 C flour: knead on counter top for 8 minutes or so. Let rise in a greased bowl, covered for at least an hour.

While it's rising, heat the light syrup, brown sugar, and butter together until melted. Mix well and pour into 2 8x8 or 9x9 baking dishes. Sprinkle chopped pecans on top of the caramel.

After the hour of dough rising, roll dough with a rolling pin onto a counter top. Roll out into about an 18 inch by 12-16 inch rectangle. Sprinkle with cinnamon and sugar (1 1/2 t cinnamon mixed with 1 C sugar.) Roll up dough and cut into 18 equal sections. Place on sides on top of caramel mixture (cinnamon & sugar side down), 3x3 in each pan. Let rise, covered, for 1 hour.

Bake at 350°F for 30 minutes or until the dough is slightly brown. Remove from oven and flip onto a cooling rack. (Place wax paper under rack.) Make sure to spoon out the left over caramel mixture that is stuck to the pan back on top of rolls.

Eat warm. Add butter if desired.
Bake well and prosper!

Tuesday, December 10, 2013

Grasshopper Dessert

I'm not a picky eater, but there are some things I really can't stand. These foods go on my "will not eat" list.

Do you have a list like this? Foods that you refuse to eat because you find them disgusting?

Well, I already mentioned in this Beer and Pretzel Cookie post that I can't stand beer nor coffee. (Funny thing is that I worked at a coffee shop for 3 years in college and still can't stand the taste of coffee/espresso. Love the smell though!) One of the other two things I can't stand is J-E-L-L-O. Lastly, while I love chocolate and I love mint, I can't stand them together.
So obviously, this dessert is something I avoid like the plague. (Jello's involved as is mint and chocolate!)

However, the rest of my family loves this dessert. I've been meaning to make it for years just to post about it, but I just couldn't bring myself to deal with actually making it.

Thankfully, my mother made it during Thanksgiving week and I happily watched her in the kitchen and took photos.
I was amused and disgusted watching my mom cut the jello. It looks alive!
Transferring the jiggly jello requires a skillful hand.
If you aren't careful, you might end up with a mess. (Yay!)
All my family enjoyed this dessert and I enjoyed taking photos of it. Don't worry. I still got a dessert. My mom had homemade chocolate chip cookies on hand - my fave!

I must admit that when I was a kid I wish that I DID eat this dessert because I loved the glasses my mom served them in. I also loved how festive this dessert is. The green is perfect for Christmas. I'm sure this could be easily turned into red jello as well, but I am definitely not the one to experiment with jello and find out!
Grasshopper Dessert (adapted from my Mom's Best Recipes Cook Book)
Ingredients
1 6-oz lime jello
1/4 C sugar
2 C boiling water
1 1/2 C cold water
1/2 t peppermint extract
2 C Cool Whip

For Topping
chocolate shavings and extra cool whip

Dissolve jello and sugar in boiling water. Add cold water and peppermint extract. Take 1 cup of the jello mixture and chill until slightly thickened. Pour remaining jello mixture into 8-inch square pan and chill until firm. Blend Cool Whip into thickened gelatin mixture. Pour into 8 serving dishes. Chill until firm. Cut the jello in the pan into cubes and place the cubes onto the thickened gelatin. Garnish with Cool Whip and chocolate shavings.
Bake well and prosper!

Friday, November 22, 2013

Potpourri: Thanksgiving Prep: Curried Apricots

I wanted to share one more potpourri/Thanksgiving prep post this week. My mother always makes this dish for Thanksgiving. It's incredibly easy to make, makes your house smell great, and tastes wonderful (especially if you love curry).
 
What are some of your family's "always make" dishes for Thanksgiving?
Curried Apricots from my Mom's Best Recipes Cook Book
Can of Apricots (any size)
Curry Powder
1+ Tablespoon brown sugar
 
Put apricots, upsides down, and juice in pan. Sprinkle a healthy amount of curry powder on top of apricots. Sprinkle brown sugar over each piece. Bake 350°F until bubbly and serve warm.
Bake well and prosper!

Thursday, November 21, 2013

Potpourri: Thanksgiving Prep: Corn Pudding

One of my best friends is currently in England right now for a year long grad school program. She wrote to me last week requesting the recipe for the corn pudding I made four years ago for Thanksgiving. She wants to make it for her college friends' "Thanksgiving" dinner. (I used quotation marks because they are having it the day after Thanksgiving and IN ENGLAND!
I kid...I just like teasing my friend about England while she's over there. Once she's back I shall desist. I promise.)
 
Anyway, her request for one of my favorite T-day dishes got me thinking about posting the recipe on my blog. Now, while this is not dessert, it IS sweet and DOES contain sugar. It's also called Corn PUDDING. AND you bake it in the oven. When it's finished baking, it's nice and shiny on top.
This dish is served warm and is very sweet with a little touch of savory via the butter. It's very easy to put together and I highly recommend adding it to your Thanksgiving meal (or as a side dish to any meal!)
Corn Pudding (adapted from my Mom's Best Recipes Cook Book)
1 15 oz can creamed corn (any size from 14-16oz will do)
6 Tablespoons butter, melted
1/4 C sugar
2 eggs
Combine melted butter, sugar, and eggs and beat with rotary beater. Add to corn and put into greased casserole dish. Bake 325 degrees F for 45 minutes to 1 hour.

Serves 3-4 people.
(To double, use 3 cans of corn and double everything else.)

Erika's Extras: This dish can be running on the bottom, so make sure to serve via a slotted spoon to drain some of the liquid.
Bake well and prosper!

Tuesday, August 6, 2013

Cookies & Cream Ice Cream Sandwich

There was a battle in my kitchen. The flour won.
Me: 10 Flour: 162
 
Sometimes the flour jumps out of the measuring cup, trying to save itself from being mixed in with the butter and beaten by the beaters. Yeah. Not because I'm messy or anything...
 
Either way, the last time I made these grapeseed oil chocolate cookies, I don't remember having such a flour problem. But I remember them being super good and that's why I decided to use the recipe while making an ice cream sandwich.
 
For the ice cream, I made a recipe from my Mom's Best Recipes cookbook: Oreo Ice Cream.
 
If you make ice cream sandwiches, I highly suggest freezing the ice cream in a tray and then using the end of a shot glass to make perfect circles for the inside of the cookies. This method worked for me and was rather messy and fun.
I brought these to a picnic in a mini cooler with 4 trays worth of ice cubes and they still melted which was so sad. BUT, they still tasted really good and were like eating cookies with milk. :) 
Use this recipe for the cookies, but only put a little bit of dough on a cookie sheet and press it down so the cookies aren't too fluffy for the sandwich ends: grapeseed oil chocolate cookies adapted from cookies & cups
 
Use this recipe for the ice cream: Oreo Ice Cream
 
Once the cookies are cooled and the ice cream frozen, cut out circular shapes from the ice cream by using the top of a shot glass. Place the cut out ice cream in the middle of two like-shaped cookies and lightly smush the ice cream out to the sides of the cookie.
 
Wrap in Saran wrap if not eating right away and store in freezer.
Bake well and prosper!

Tuesday, February 5, 2013

Potpourri: Broccoli Peanut Salad

This is my "go to" salad for different types of "bring a dish" gatherings. Every time I make it people go crazy over it!
It's a great salad. Salty. Sweet. Healthy. Bacon. I grew up with it so I guess I never realized what a winner it was until people who had never had it before sang its praises.
 
I've been promising to post the recipe for awhile now. I will finally fulfill that promise with this post. Whew!
 
So now you, too, can make an awesome salad to empress people at your next potluck gathering!
Broccoli Peanut Salad (from my Mom's Best Recipes Cookbook)
1 bunch of broccoli, washed and cut into small chunks
3/4 C raisins
1 C (or less) unsalted peanuts
3 strips of bacon, fried crisp and broken

Dressing:
1/4 C sugar
1 T vinegar
1/2 C mayonnaise
2 t chopped onion
(Mix all of these in a separate bowl and then stir in to the salad.)
Bake well and prosper!

Tuesday, December 11, 2012

Overnight Coffee Loaves

So, last week I had a pretty important birthday.
Watch out New York City! You just gained another 30 year old female! I was very excited to leave my 20s behind. Not that they were bad. But I think there's something great about being in your 30s in NYC. I guess I just feel that this city caters to a slightly older crowd.
 
Speaking of catering to crowds, I baked up a storm to feed my friends for my birthday party! (I'll be posting all my baked goods this week, so keep your eyes out for everything.)
 
To usher in my 30s I decided to give back to my favorite city. I held a two part party. First part was picking up trash in Astoria Park. Second part was meeting at a bar. Those friends who volunteered were treated to a free happy hour on me. Those who decided to not volunteer and just meet at the bar paid for their own drinks. People really enjoyed this concept and everyone understood the rules.
 
Well, I couldn't have people picking up trash on an empty stomach now could I?
 
Since I had taken some days off of work to celebrate my birthday, I decided that I finally had enough time and I was finally mature enough to make Overnight Coffee Loaf.
 
You see, this is from my Mom's Favorite Recipes Cook Book. And all of my siblings and I LOVE this bread. So, I had some trepidations about making it. This bread had a lot of history behind it and I didn't want to mess it up.
 
Guess what. Within the first steps of the recipe I was a mess.
Thus, the bread turned out FANTASTIC.
I was fortunate enough to have a friend over who got to taste test it with me right when it came out of the oven. It was to die for. We ate a whole mini loaf. (I couldn't find my other loaf pan so I improvised. See below.)
I was very excited to share it with my volunteers before picking up trash. Too bad it was a gloomy and somewhat cold day. This bread is just so much better warm than cold. Nobody had a problem eating it though. :) And tons of trash was picked up! (Must have been the boost of sugar that helped. Here's a little bit of the trash that was found.)
Yes, that's a prescription bottle on the bench filled with lithium. Found. In. A. PARK! Eek!

So, as you can see, the first part of my birthday party was a success. Many of my friends told me that they didn't expect to have so much fun picking up trash. Ha!

Second part of party and more recipes from my birthday week to come. For now, here's the recipe for this delicious bread.
Overnight Coffee Loaf (from my Mom's Best Recipes Cook Book)
Makes 2 loaves of bread

1 pkg dry active yeast (or scant 1 T)
1/4 C warm water
4 C flour
1/4 C sugar
1 t salt
1 C butter or margarine (softened)
3 egg yolks
1 C lukewarm milk, scalded and cooled
2 T melted butter or margarine
1/2 C sugar
1 1/2 t cinnamon
powdered sugar glaze (powdered sugar and milk)

Soften butter. Cut in flour, 1/4 C sugar, and salt until mixture looks like a pie crust mixture. Dissolve yeast in warm water and stir with a fork so no big lumps form. Once stirred, mix in yeast, egg yolks, and milk. Cover; refrigerate at least 8 hours or overnight. Grease 2 loaf pans. Divide dough in half; roll out each half into an oblong shape that will fit into your loaf pan length wise when rolled up. Does not need to be super thin. Brush one side of each flattened dough with 1 T melted butter. Mix sugar and cinnamon. Sprinkle half on each half. Roll up dough, placing seam side down in pan. Cover and let rise 2 hours; dough will not double in size. Bake 350 for 1 hour. Remove from pan and let cool for a couple of minutes. Frost with powdered sugar glaze (mix 1 C powdered sugar and a tiny bit of milk.)
Erika's Extras: Add more cinnamon and sugar for a bolder cinnamon flavor in the bread.
 
Bake well and prosper!

Thursday, November 29, 2012

Swedish Cookies

It's been a week since Thanksgiving! Feels like much longer than that. A week ago I watched a monkey flying.
A frog floating.
A cat hovering.
I saw girls who can soar through the air too!
And it all finished with the man in a flying sled.
No wonder this past week has FLOWN by. ;)
 
Last week I was lucky enough to receive these Swedish Cookies from my mom (via my dad who brought them up with him when he visited.)
 
When I was younger these cookies were not my favorite because I was more focused on the chocolate and super sweet cookies. But now that I'm older and my taste buds have grown to love a lot more things, I really enjoyed eating these cookies. Thanks mom!
Swedish Cookies (from my Mom's Best Recipes Cookbook)
1 C butter
½ C powdered sugar
1¾ C flour
½ C chopped pecans (or a little more)
1 t vanilla
Cream butter well; add remaining ingredients. Roll into balls about 1" in diameter. Bake at 350°
for 15 min. While still a little warm, roll in powdered sugar.
 
(made by guest baker: my mom)
Bake well and prosper!

Thursday, April 5, 2012

Trefoil Magic Bars

I've waited over a year to make this recipe. It's true! I had the idea last year during Girls Scout cookie season, but I ate the cookies instead of baking with them. Whoops! These things happen...

So, I had the idea to switch out graham crackers in the Holiday Bars Recipe. I figured that smooshed up Trefoils (aka Shortbread Cookies), would make a lovely base for this recipe.

And that's what I did. I discovered that these cookies can be hard to crush into pieces due to the edges. The best method is to smoosh them while they are still in the plastic bag. Cut one end of the bag and crush while the cookies are slowly leaving the bag.
Look! That's them after being baked. They made a great crust! I'm a genius! Well, very close to one...

Oh, and one more thing it has taken me a while to do: I moved! Again! I'm still in Astoria, but remember how lively I said it was? Well, there was plenty of noise (read: TOO MUCH) from the bar across the street. So, in December I had the chance to move in with a college friend and on a quiet block. It's lovely! And I'm only a couple blocks away from the lively section (for when I want to go out.) :)
Check out my new kitchen!
It's old school and comfy (and not too small like most NYC apartment kitchens are.)

Anyway, baking has been going well in the new place. How's your baking been going?
Trefoil Magic Bars (adapted from Mom's Best Recipes)
1/2 C margarine
1 box of Girl Scout Trefoils, crushed into crumbs
1 can sweetened condensed milk
1 6-oz pkg chocolate chips
1 1/2 C shredded coconut
1 C chopped nuts (Erika's Extra: I used walnuts this time around)

In 13 by 9 inch pan, melt margarine. Remove from heat. Sprinkle crumbs over margarine. Pour milk evenly over crumbs. Top with chocolate chips, coconut, and nuts; press down gently. Bake at 350 degrees for 25 minutes or until golden brown. Cool and cut into 3 by 1 1/2 inch squares.

Erika's Extra: On one half, sprinkle the nuts and keep the other half nutless (for those who don't like nuts.) (Is nutless even a word?!)
Bake well and prosper!