Thursday, October 21, 2010

An Apple a Day - Apple "Nacho" Bites

Welcome to Day 2 of
I'm really excited about this recipe. I saw it on Real Mom Kitchen and bought an apple corer that same day. (Laura aka Real Mom was even awesome enough to answer my question of if the apples turn brown too quickly with this recipe. Answer: She left them out for an hour and they didn't brown. Sweet!)

I made this last night and my boyfriend and I loved it! I even brought the ingredients in to work today to make it again for a yummy mid-afternoon snack.

I modified the slices of apple into chunks of apple seeing my upper arm strength is lacking and an apple corer made me sweat!

This is great for an pick me up at work or a go to after school snack!
Apple "Nacho" Bites (adapted from Real Mom's Apple Nachos)
Ingredients
•30 large marshmallows
•1/3 cup butter, cubed
•1/4 cup caramel apple dip
•4 medium tart apples, sliced into bite sized pieces (I used Macintosh apples)
•1/3 cup nut topping (the kind with the ice cram toppings) or chopped dry roasted peanuts
•1/3 cup miniature semisweet chocolate chips

Directions
1.In a large saucepan, melt marshmallows and butter.
2.Arrange apples in small bowls or plates. Place caramel dip into a quart sized zipper bag. Snip off one corner with some scissors and drizzle caramel over the apples.
3.Then drizzle with the marshmallow mixture. Sprinkle with nut topping and chocolate chips. Serve immediately.

Erika's Extra: I halved the recipe. I found that you can also microwave the butter and marshmallows (I used minis) and it yields the same results. Just microwave for 15 seconds, stir, and repeat until the gooey consistancy forms. Be careful though - the microwaved bowl will be hot!
Have you recently blogged about an apple dessert? Send me the link at erika8cookies@gmail.com. My last post in my Apple a Day posts will include a list of others' links of apple recipes. (Dessert only please!)Thanks!

 Bake well and prosper!

Wednesday, October 20, 2010

An Apple a Day - Apple Pancake Surprise

Did you just pick a bunch of apples/buy a bunch of apples too?
I went to Terhune Orchards in Princeton, NJ this past Sunday and went hog apple wild with picking!

I LOVE apples. I have apples in my fridge all year round, but everyone knows fall is the best time to get them from local orchards.

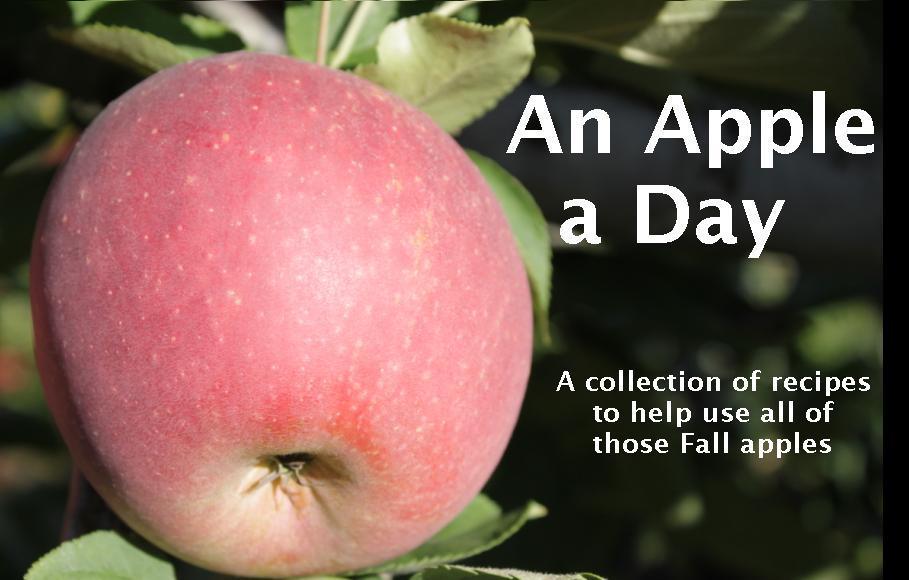
So, in an effort to help everyone out with their apple excess, I introduce to you:
For the next couple of days I will be posting apple recipes. First up: a recipe I made up last night.

I recently bought an apple corer and thought to myself how lovely it would be to encase a slice of apple in a pancake. So, without further ado, I bring you:

Erika Beth's Apple Pancake Surprise
Ingredients
One apple (I used a Stayman Winesap)
Pancake mix (I used buttermilk)
(Egg or whatever else your pancake mix calls for)

Directions
Core an apple.
Cut apples into very thin slices.
Start heating skillet or pan.
Make pancake mix acording to directions.
Pour a small amount of mix onto pan and firmly press an apple slice onto batter. Cover top of apple with a thin layer of batter.
Let cook on one side for longer than you would a normal pancake and then flip.
Make sure the other side is done well before serving. (If not, the batter by the apple will still be gooey!) If some batter escapes when flipping, feel free to scoop the pancake up after done and roll it on its side on the pan.

Cool slightly and then pick up and eat with hand. It's so delicious, no syrup needed. Sprinkle powdered sugar on it if you must.

Check it out:
These seem like normal pancakes.
Surprise! There's an apple in the middle!
Bake well and prosper!

Monday, October 18, 2010

Gluten Free Cookies

I can't always be cutesy wootsey. I don't have kids, a dog, a husband, a huge kitchen, or a perfect life. And I'm sure not going to pretend I have a life all neatly packaged with a bow on top. Quite frankly, I'm tired of seeing that blogged about constantly. I'm not trying to be the next Betty Crocker or on the next cover of Good Housekeeping. Is there a Messy Housekeeping magazine I can be on instead?

Oh, and did I mention I'm in a bad mood today?

Well, I will try to look on the upside. At least I don't have to eat a gluten free diet. That means I couldn't enjoy this, this, or these. But, if you're a celiac like my friend from the opera I was in this past weekend, there's good news! Yummy gluten free cookies!

This is the first gluten free dessert I've made for a gluten-free eater and I was a little scared when the dough smelled like burnt peanuts after blending in a mixer. Do not fear, they turned out amazing!
Gluten Free Peanut Butter and Nutella Thumbprint Cookies (from bell'alimento)
Ingredients
1 cup creamy peanut butter
1 cup sugar
1 large egg – beaten
1 teaspoon salt
1 teaspoon baking soda
9 teaspoons Nutella

Instructions
1. Preheat oven to 350 degrees.
2. Into your stand mixer add sugar, peanut butter, egg, salt and baking soda. Mix until well combined.
3. Measure approx 1 tablespoon of dough. Roll dough into a ball and place onto cookie sheet. Gently press dough ball down using the palm of your hand. Continue forming balls until dough is gone. Space approx 1″ apart.
4. Bake for approx 8-10 minutes. CAREFULLY remove tray from oven. Using a 1/2 teaspoon measuring spoon, GENTLY make an indentation in the middle of each cookie. Fill each cookie with a dollop of Nutella. Return tray to oven and continue cooking for 2-4 minutes until golden.
5. Transfer cookies to a cooling rack and allow to cool before enjoying.
Bake well and prosper!

Monday, October 11, 2010

It's Fall, Y'all!

Some of you might not realize that it's fall, but it is! (Some of you = people in southern areas...TX, AZ, southern hemisphere...)

Here in NY the trees in Central Park are having a conference on whether to change colors or just drop. Last year they decided to change colors. I hope they vote on that again.

For my friend's birthday party this past weekend I decided to make some treats, but adjust them slightly to incorporate fall colors.

I took out my humble little food processor that says, "Now you see it (the Oreos)..."
"Now you don't."
Hurray for the Humble Little Food Processor That Could!

Those chopped up Oreos were used in this awesome recipe:
Oreo Cheesecake Pretzel Sandwiches (adapted from Rather Be Baking)
Makes 12 pretzel bites

Ingredients:
7 Oreo cookies
1 ounce cream cheese (I used reduced-fat)
24 pretzels (square or tied, it doesn't matter)
Candy coating - melted (your choice of colors. I used red, yellow, and then mixed some red and yellow with orange to make a delightful fall orange.)

Place Oreos into a food processor and process until finely ground. Mix Oreo crumbs and cream cheese until dough forms. (Erika's Extra: I found it easier to mix with hands.) Pinch about half a tablespoon of dough and form into a little square. Place onto pretzel then gently press top pretzel to close. Top with melted candy coating. (Add toppings like white sprinkles or coconut, if desired.) Chill until chocolate has hardened and serve. Store any leftovers in the refrigerator or freezer.
Bake well and prosper!

Monday, October 4, 2010

Blog Birthday!

A year ago today I decided to not just bake, but capture my baking via a blog. (Oh, and to capture my messes as I baked). (First post: Well, here we are) Looking back, not a lot has changed.

I still make messes.
Flour is my number 1 nemesis with powdered sugar a close second.

I still get the mess all over my hands.
Mmmm...cake batter. Which reminds me...

I still eat cake batter/dough etc.
I still run, sing, and work at a hedge fund. I still live in the same apartment as a year ago. I'm still a total dork.

Things that have changed within the year:
I broke down and bought a fancy schmancy camera. (Post: I'm a Sell Out)

I somewhat learned how to use said fancy schmancy camera. (Still learning, really.)

I got a boyfriend! (Is got the right word? Caught, perhaps?) UPDATE: Threw him back into the sea.

I'm growing my hair out of my pixie cut.

I've added ads to my blog, although no one has seemed to notice.

I've discovered foodgawker.com and tastespotting.com which has opened up the wonderful world of food blogs and getting to meet (via online) the creators of scrumptious dishes.

I've had more than 10,000 visitors to my site (which might not be a lot for some blogs out there, but means the world to me. Speaking of which - did you know that New Zealanders have a mighty strong sweet tooth?)

So, overall, I've had a lovely year and decided to celebrate by baking a cake from scratch, which I can't remember ever doing. I also made some lavender buttercream frosting. Yum yum yum! Both turned out lovely and were a great way to celebrate.
Chocolate Cake (from allrecipes.com)
Ingredients
1 cup margarine
1 3/4 cups white sugar
3 eggs
1 1/2 teaspoons vanilla extract
1 1/2 cups milk
2 1/2 cups all-purpose flour
6 tablespoons unsweetened cocoa powder
1 1/2 teaspoons baking soda
1 teaspoon salt

Erika's Extra: I added in Ghiradelli chocolate chips, because it was my blog's birthday and because I could.

Directions
Preheat oven to 350 degrees F (175 degrees C). Grease and flour a 9x13 inch pan. Sift together the flour, cocoa, baking soda and salt. Set aside.

In a large bowl, cream together the margarine and sugar until light and fluffy. Beat in the eggs one at a time, then stir in the vanilla. Beat in the flour mixture alternately with the milk, mixing just until incorporated. Pour batter into prepared pan.

Bake in the preheated oven for 40 to 45 minutes, or until a toothpick inserted into the center of the cake comes out clean. Allow to cool.
 
Lavender Buttercream Frosting
Ingredients
1 stick softened butter
2 cups powdered sugar
1/3 cup milk
1 Tablespoon + of dried lavender buds.
Red Food Coloring
Blue Food Coloring

Directions:
In a pan, bring heat milk and lavender until boiling point. Let cool/infuse for 10+ minutes. Strain lavender from milk. In a mixing bowl, cream the butter. Beat in the sugar. Pour in 2 Tablespoons only of lavender milk. Frosting should be at a good texture, but feel free to add more milk to change the consistency and flavor of the frosting. Mix in 4 drops of each color of food coloring.
Bake well and prosper!