Showing posts with label raw. Show all posts

Tuesday, January 7, 2014

Raw Dessert: Chocolate Mousse Tarts with Cashew Cream

Happy New Year! Did you make a resolution? I had figured out one of my resolutions in the middle of December. I wanted to eat raw foods for all of Jan. But then I realized that I'll be visiting New Orleans in January, so I was a little behooved since I knew I'd be enjoying the traditional NOLA food (which is far from raw).
 
But then I realized that I could view every day as the start of a new year! Thus, on Dec 26, I started eating my raw foods diet and have been on it every day since (minus one dinner.)
 
It's been so helpful within the past couple of cold days to be eating raw foods. My skin usually gets really dry in the winter, but if I eat my raw foods diet of mainly greens, nuts, and fruits, my skin has no problem (even in this 5 degree weather). Yay!
 
A couple of months ago I discovered a wonderful raw food blog: This Rawesome Vegan Life. You guys should check it out. It contains tons of beautiful food and photography.
 
Anyway, I visited it again this past weekend to find a dessert and voila! I made this tart. I really like its creamy and sweet filling surrounded by a firm crust. Next time I think I would double the crust and mousse recipe and then put it all in a springform pan.
Chocolate Mousse Tarts with Cashew Cream (adapted from This Rawesome Vegan Life)Crust: (Erika's Extras: I would double this and put in a springform pan.)
3/4 cup oats, buckwheat groats or nuts
3/4 cup raisins
1 heaping tablespoon cacao powder
1 tablespoon of raw honey
1 teaspoon cinnamon (optional)
Lemon cashew cream:
1 cup soaked cashews
Juice from 1 lemon
1/4 of a banana, sliced
pinch of Himalayan pink salt
Chocolate mousse: (Erika's Extras: I would double this as well.):
1 avocado
1 cup dates
1 teaspoon vanilla extract
1-2 tablespoons cacao powder
1/2 cup water, more or less as needed
1 tablespoon melted coconut oil
 
To make the crust: pulse the oats, buckwheat groats or nuts in a food processor until they turn into crumbs. Add the rest of the ingredients and pulse until it all sticks together. Press into two lined tart tins and put in the fridge.
To make the cashew cream: blend all the ingredients until smooth. Set in the fridge.
To make the mousse: blend all the ingredients until smooth. Spread into the bottom of your tart crusts and cover with the cashew cream. Put back in the fridge overnight or for at least a couple hours. Dust with cacao and serve!
 
Erika's Extras: Make sure you have soaked cashews (which takes a couple of hours) before you start assembling. Recipe takes about 20 minutes to make and then a couple of hours to set.
Bake well and prosper!

Friday, October 4, 2013

Raw and Gluten Free Magic Bars & Blog Birthday!

"Happy birthday to my blog! Happy birthday to...oh wow. FOUR years?!" Those were the thoughts that coursed through my mind while getting ready for this post. I cannot believe I have been blogging about my baked goods (and sometimes my life) for four years. It doesn't seem like four years. It seems like two and a half. It's been so fun and cathartic and, well, delicious!
 
I must admit that I was a little saddened to read last year's blogiversary post...and the year before's post...and the blogiversary post from 2009. Besides travelling more (yay!), it seems like not much has changed in my life over four years except for the apartments I live in and my hair. (Which is nice and "long" now compared to when I had a pixie cut.)
(Yes, that IS me eating a fried oreo in Little Italy.)
 
Besides these two things I'm still working the same day job, I still sing operatically, I still run (well, I did until my injury last week), and I still love hanging out with my friends whenever possible. (And sometimes I do more than one of these things at a time!)
It's not that I was expecting some drastic change in my life within the last fours years, and quite frankly I can be very thankful that nothing drastic HAS happened. Whew!
 
But then I realized that one thing has changed (besides me joining pinterest...). It doesn't seem like that big of a deal to me so maybe that's why I didn't think of it right away, but, in the grand scheme of my blog, it IS rather important:
 
I enjoy eating healthy!
 
Yes, ever since Feb, 2012, I've incorporated more fruits, veggies, and nuts in my diet. There are also many weeks when I do a raw foods diet.
 
Don't worry. I still love desserts and still completely believe that life IS too short to skip dessert. But my taste buds have become a little more picky and I prefer artisnal, lightly crafted desserts more than the heavy, super processed, and preservative heavy desserts. The fact that there is an abundance of blogs out there with posts on those kind of desserts makes me feel ok about the lack of them on my blog. (Mind you, I'll still bake them from time to time...especially around Christmas time.)
 
I've actually been enjoying baking vegan, gluten-free, raw,  or just healthy desserts recently (which I'm sure that you, my awesome readers, have noticed.) It's so fun to make up my own recipes as well, like the recipe for this post. I loved my raw and gluten free magic bars so much that I've been making single serving parfaits for myself each day this week.
Besides this "hits the spot" recipe, some of the other recipes I loved/am proud of that I made this last year are:
Overnight Coffee Loaves I was so proud of myself for making these. They were perfect, just perfect (and even more so when eaten right after they came out of the oven.) I hope to make them again when I have more time to take better photos of them.
Homemade Donuts This recipe pushed me out of my baking comfort zone which resulted in amazing donuts. Once again, I was very proud of myself for the success of these donuts.
No Bake Peanut Butter Cup Granola Cookies  These were an instant hit and it's hard to eat just one. I'm currently wishing I had one to eat right now...maybe I'll make a healthier version of them soon...
Raw & Gluten Free Honey Bunches of Oats Bars I made up this recipe after making my own almond butter for the first time. I was proud of my own recipe and happy with the yumminess of the bars.
Heart Shaped Italian Macarons This recipe required a lot of attention and I'm happy to report that both times I made macarons in the last year they all turned out to be scrumptious. These heart shaped ones were so cute! Next time I'll try to make some without splits on top.
Cherry Poppyseed Cake I'll just reiterate what I wrote about this cake back in summer: This cake is so lovely, especially for summer seeing it's somewhat light in consistency and uses cherries. I added a nice whipped cream that helped bring out the flavors of the poppy seeds and the cherries. I highly recommend making this cake.
"Almazing" Almond Bars I am dead serious about these bars being amazing. I'm craving one right now just thinking about them!
Cherry Lemonade Bars with Lavender Frosting Thankfully I decided to enter a baking contest this year. While I didn't win, this is hands down my favorite recipe of the year. I made it three times within a week since it was so amazing. (And part of the recipe is mine!)
 
There are plenty more recipes I loved this past year, but these are the ones that stick out in my mind the most.
 
Hopefully my next year of blogging will be just as successful when it comes to baking. I can't wait for another delicious year! 
Raw and Gluten Free Magic Bars (an Erika Beth original recipe)
1 cup raw & pitted dates (I used medjool dates)
2 Tablespoons of nut milk (I used a mixed nut milk)
1 Tablespoon of raw honey
1 cup pecan butter (I made my own - feel free to substitute a different nut butter)
1/2 cup of gluten free dried oats
1/4 cup of unsweetened, dried, and shredded coconut
2 Tablespoons of cacao nibs
 
In a medium bowl, stir the honey into the nut milk and then soak the dates in the mixture for an hour. Then put the dates and the milk into a food processor and process until the mixture becomes sticky and like caramel. Mix the pecan butter with the oats and spread evenly on the bottom of a small square container (about 4x4 inches. *see photo below). Once an even layer is on the bottom of the container, spread the date "caramel" evenly on top of that layer. Then sprinkle the coconut on top of the caramel layer. Then sprinkle the cacao nibs on top of the coconut. Refrigerate for at least an hour and then cut into small squares and enjoy.
Bake well and prosper!

Thursday, September 12, 2013

Raw & Gluten Free Honey Bunches of Oats Bars

You know when it's just too hot out to turn on the oven? You know, so hot that you're sweating when you're just standing in your kitchen, let alone moving in your kitchen?  Yeah, well, NYC is going through an end of summer heat wave right now and I just couldn't bear to turn on the oven. (Sometimes I do, mind you...but I just couldn't do it this time seeing the weather's been so nice recently.) (Oh, and no, I don't have an AC unit in my kitchen.)
 
So, I decided to use my new 12 cup food processor and make almond butter for the first time. After I made that, I decided to see what kind of bar I could make with some of the almond butter. 
 
Sometimes making up your own recipe creates an incredibly scrumptious, "hit-the spot" dessert. This one contains a strong honey flavor while also packing in protein awesomeness with the almonds. I highly suggest that you, too, go have some fun in your kitchen by making up your own recipes (if you haven't already...) Just make sure to stay cool when you do!
Raw & Gluten Free Honey Bunches of Oats Bars
           (an Erika Beth, the Messy Chef recipe)
3/4 C Almond Butter
4 Medjool dates, finely chopped with a knife or ground down in a food processor
1/2 C+ gluten free rolled oats (I used Bob's Red Mill Brand)
1 Tablespoon+ honey
 
Mix almond butter and chopped dates in a bowl. Once well combined, add oats. Mix until well combined. Feel free to add more oats until texture is to your liking. Once well combined, stir in the honey. Add more honey to liking. When completely combined, mixture should stick together and be close to a ball shape. Grab some of the dough and make it into a bar shape. Place in container or on a plate and refrigerate for at least an hour or overnight. Serve slightly chilled.
Bake well and prosper!

Wednesday, April 24, 2013

Raw & Vegan "Cookie Dough" Treats

Oh man. I have been slacking off in the kitchen. This is my first recipe post for April. (Yeah...I know...it's already April 24.) I could make a lot of excuses, but I'm just going to make one: this long winter in NYC is zapping my want to do much of anything. It's kind of sad.

Wearing a coat at the end of April is not my idea of stimulating.

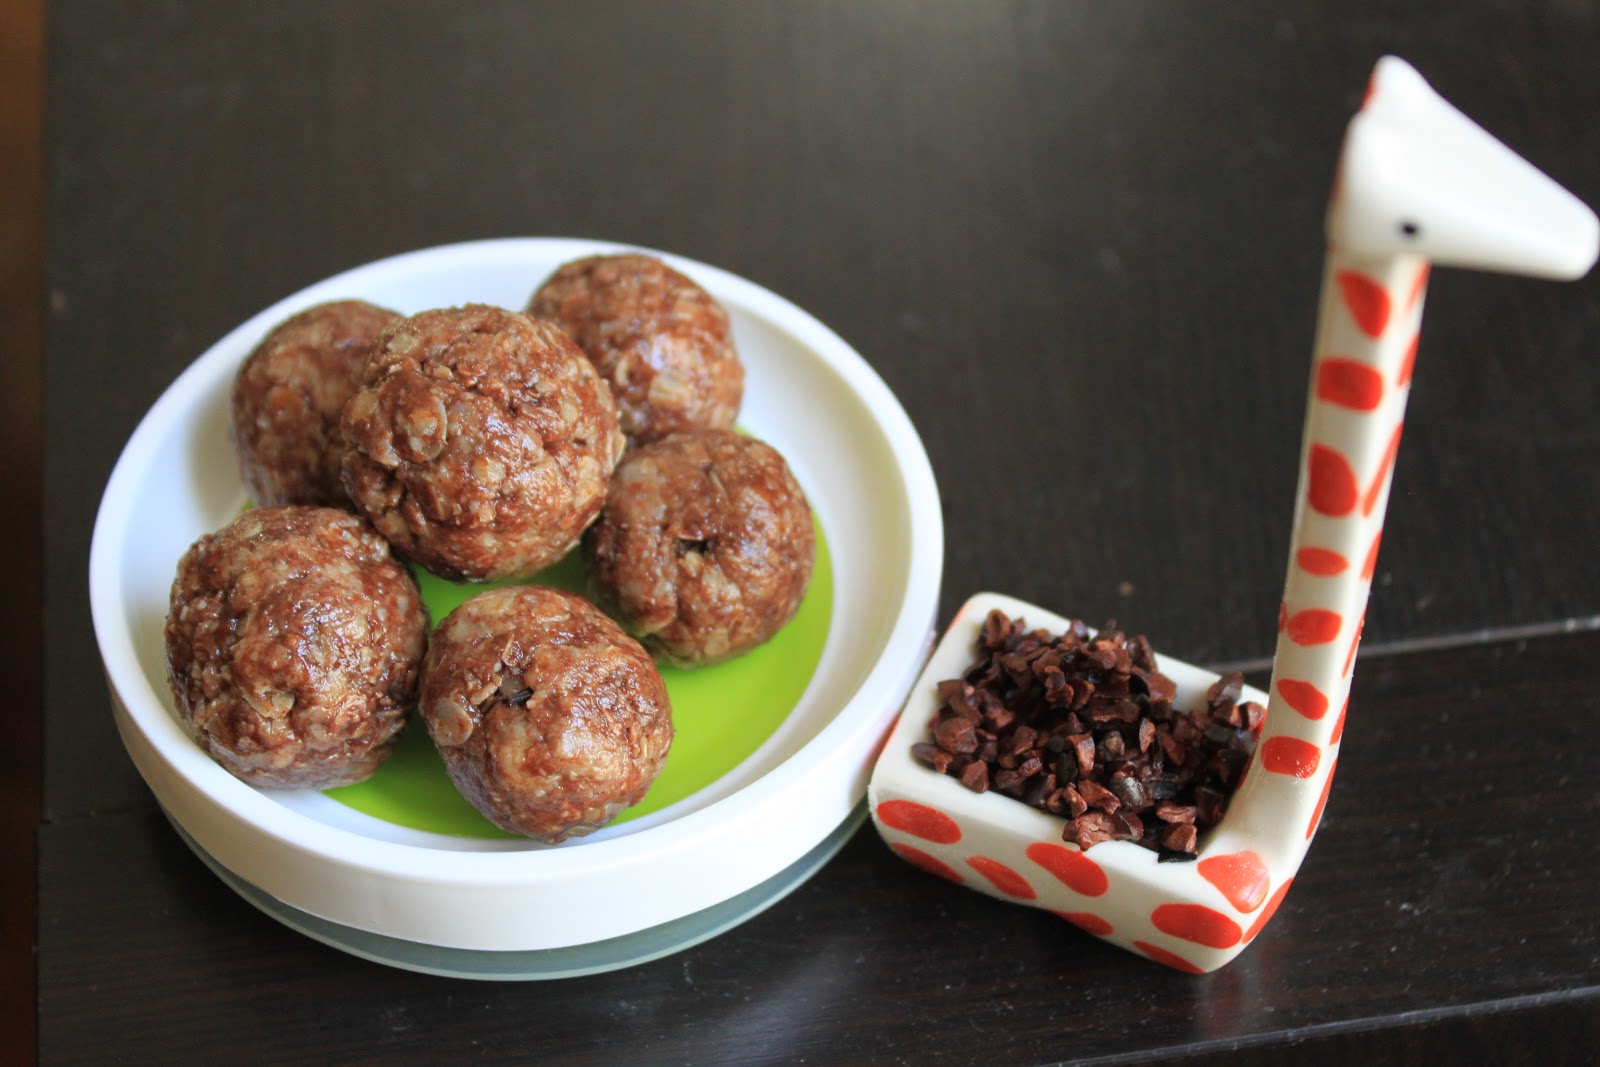
Trying to make my own raw food recipe, however, DID stimulate my mind. Yesterday I started thinking of ways to make my own dessert recipe with almond butter. And can I just say, "Ohmygoodness! Thisissogood! Wanttoeatall! Nom nom nom."

I knew I wanted to make something with raw almond butter so I went to the local organic bodega in my neighborhood and bought some. (Please note: you can make your own almond butter, but my food processor is in need of an upgrade.) While I was in the store I also grabbed some raw chocolate sauce.
In my kitchen I grabbed some oatmeal and agave nectar and started to blend all four ingredients together. The "dough" came together beautifully. But I felt like it was missing something...
Ah! Cacao nibs! Yes! I rolled the dough in the nibs and thus created a lovely snack that I plan to make all week long. (Or until my ingredients run out.)
So, if you would like an easy treat to make that's also fairly good for you, try this recipe. It really does taste like cookie dough!
Raw & Vegan "Cookie Dough" Treats (by me!)
3/4 cup of dried oatmeal (I used quick oats)
2+ Tablespoons of raw almond butter
1+ Tablespoon of raw chocolate sauce
1 teaspoon of agave nectar (or use raw honey, maple syrup, or a food processed date)
cacao nibs for rolling the dough in

Stir the oatmeal, almond butter, and chocolate sauce together. Add more almond butter/chocolate sauce as needed to get the desired consistency. Stir in the agave nectar. This will help solidify the dough. Roll small amounts of dough in palm of hand and then roll in cacao nibs. Eat room temperature or place in fridge for 30 minutes.

Makes around 15.
Store in air tight container in fridge.
Bake well and prosper!

Tuesday, February 19, 2013

Raw Almond Joy Macaroons

I suppose I can add this recipe to my New Year's resolution: try new methods of baking/making dessert. The thing is, I'm very familiar with the raw foods lifestyle. In fact, and this might come as a shock to you, I eat a raw foods diet a lot.
 
Are you back on your chair yet?
 
I know. It's a little alarming. Someone with a baking blog who eats raw?!
 
Well, it's true!
 
And I am happy to say that I finally made a raw dessert!
Usually I buy raw desserts to consume. Then I saw a recipe for one that didn't require a dehydrator!
 
I found some cacao nibs and some dates and made these yummy treats. Try it for yourself or make it for your raw foodie friend or a celiac friend since they are also gluten free.
Raw Almond Joy Macaroons (adapted from Oh Ladycakes)
1 cup shredded coconut (sweetened or un)
3/4 cup raw almonds
Pinch of salt
8 pitted medjool dates
3 tbsp raw almond milk (or water) (Erika's Extras: I used water)
1/4 cup cacao nibs
1+ Tablespoon of agave nectar

Blend the coconut, 1/2 cup of the almonds, and salt in a food processor. Blend until conformed into a thin constitency/dough. Add the dates and blend until combinded. Add the water or almond milk and continue to blend in or stir in with a spoon when transfer the mixture to a bowl. Stir in the cocoa nibs. Coarsely chop the remaining almonds and add them into the mixture along witht he agave nectar. Grab a little less than a tablespoon of the dough and roll into a ball. Drop the dough onto a baking sheet lined with parchment paper. After 30 minutes in the freezer they are ready to eat. Keep stored in a container in the freezer until they're all gone (which shouldn't be more than 3 days since they're so good!)
 
Erika's Extras: Feel free to reduce the recipe. Easy to do when there's no eggs involved.
Bake well and prosper!